YardSauna Forest 3-Person Infrared Sauna Setup Guide
Bringing a home infrared sauna into your life is one of the most rewarding wellness upgrades you can make, but the setup process can feel intimidating if you have never assembled a large piece of equipment before. The good news is that modern modular saunas are designed for straightforward home assembly, and the YardSauna Forest 3-Person Infrared Sauna is a prime example of that user-friendly approach. This guide walks you through every phase of the setup, from the moment the boxes arrive to your first relaxing session, so you can enjoy your new sauna with confidence and peace of mind.
Before Your Sauna Arrives: Planning and Preparation
A smooth sauna setup starts long before the delivery truck pulls up. Taking time to plan the location, electrical requirements, and assembly logistics will save you hours of frustration and prevent costly mistakes. The YardSauna Forest is a substantial piece of furniture, so you want to be sure your space is ready to receive it.
Choosing the Right Location
The first decision is where the sauna will live. Indoor placement is most common for this model, and you have several options: a basement, a spare bedroom, a large bathroom, a garage, or even a dedicated wellness room. The key factors to consider are ceiling height, floor strength, proximity to a dedicated electrical circuit, and ventilation. The YardSauna Forest stands 75 inches tall, so you need a ceiling clearance of at least 78 to 80 inches to allow for air circulation and any slight leveling adjustments. The floor must be level, dry, and capable of supporting the sauna’s weight plus the weight of up to three occupants. A concrete slab, tile floor, or sturdy wood subfloor all work well. Avoid carpet if possible, as it can trap moisture and make leveling more difficult. If carpet is your only option, place a sheet of plywood or a waterproof mat underneath the sauna to protect the flooring and provide a stable base.
You also want to think about how you will use the sauna. If you plan to use it after workouts, a location near your home gym or bathroom makes sense. If you want to relax before bed, a spot close to your bedroom is ideal. Many homeowners choose a basement because it stays cool, offers privacy, and often has easy access to electrical panels. Whatever you choose, make sure the sauna is not blocking any doors, windows, or walkways, and leave at least 12 inches of clearance on all sides for ventilation and future maintenance access.
Electrical Requirements: The Critical Step
The YardSauna Forest is a 220V-240V appliance, which means it cannot simply plug into a standard 120V wall outlet. You will need a dedicated circuit installed by a licensed electrician. This is not a DIY project unless you are a qualified professional. The sauna’s heating system draws significant power, and an improperly wired circuit can create a fire hazard or damage the sauna’s electronics. A dedicated 20-amp or 30-amp circuit is typically required, depending on the exact specifications of your unit, so check the manufacturer’s documentation that comes with your sauna. The electrician will need to run the appropriate gauge wire from your electrical panel to the sauna’s location and install a suitable outlet or hardwire connection point. Plan for this step well in advance, because scheduling an electrician can take a few days to a few weeks depending on your area.
One common mistake is to assume that a dryer outlet or other 240V outlet will work. While the voltage may match, the amperage rating and plug configuration often differ, and sharing a circuit with another appliance is unsafe. The sauna must be on its own dedicated circuit with no other loads. When the electrician installs the outlet, ask them to place it within a few feet of where the sauna’s power cord will exit, but not directly behind the sauna where it would be inaccessible. A side wall or slightly offset location works best. Also, ensure the circuit is protected by a GFCI breaker if required by local code, as this adds an extra layer of safety against electrical shock in a humid environment.
Gathering Tools and Helpers
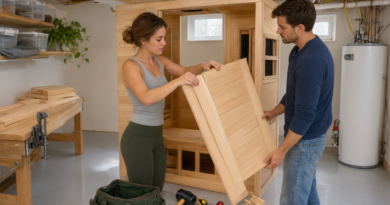
Assembly of the YardSauna Forest is designed to be manageable for two adults, and the tongue-and-groove modular panels make the process surprisingly quick. However, you will need a few basic tools and supplies. Have on hand: a rubber mallet (for tapping panels together without damaging the wood), a Phillips head screwdriver, a level, a tape measure, a step ladder or sturdy stool, and a pair of work gloves to protect your hands from splinters. A cordless drill with a Phillips bit can speed things up, but be careful not to over-tighten screws. You may also want a drop cloth or moving blanket to protect the floor during unpacking. Clear a large open area near the final location where you can lay out the panels and sort the hardware. Good lighting is essential, as you will be working with small screws and connectors.
Read through the entire instruction manual before you start. Even if you are an experienced DIYer, each sauna model has specific assembly sequences and wiring connections that must be followed exactly. The manual will include a parts list, so take inventory of all panels, hardware, and accessories before you begin. If anything is missing or damaged, contact the manufacturer immediately rather than trying to improvise.
Unpacking and Inspecting the Shipment
When your YardSauna Forest arrives, it will likely be delivered on a pallet and may be quite heavy. The shipping weight for a 3-person sauna can exceed 500 pounds, so arrange for delivery to a ground-level location if possible. If you need to move the boxes up or down stairs, recruit extra help or hire professional movers. Do not attempt to move the entire pallet by yourself.
Step-by-Step Unpacking Process
- Position the pallet near your assembly area. Use a pallet jack or furniture dolly if available. Remove the plastic wrap and any strapping carefully, watching for sharp staples or nails.
- Inspect the exterior boxes for damage. If you see crushed corners, punctures, or water stains, take photos before opening. Note any damage on the delivery receipt before signing.
- Open each box and remove the contents systematically. The sauna will be packed as several large panels, a roof section, a floor section, benches, a door with glass, and a box of hardware and electrical components. Lay the panels flat on a clean, soft surface to avoid scratches.
- Check the parts list against the actual contents. Count every panel, screw, bolt, bracket, and wire. The hardware is often packed in small bags labeled with letters or numbers that correspond to the assembly steps.
- Inspect each panel for any cracks, warping, or finish issues. Canadian Hemlock is a beautiful, durable wood, but it can be susceptible to minor dings during shipping. Most small imperfections are cosmetic and will not affect function, but significant damage should be reported immediately.
- Set aside the electrical components. The heating panels, control console, power supply, and wiring harnesses are delicate. Keep them in a safe, dry place until you are ready to install them.
Taking your time during unpacking prevents the frustration of discovering a missing part halfway through assembly. It also gives you a chance to familiarize yourself with the components before you start fitting them together.
Assembling the Modular Panels
The YardSauna Forest uses a tongue-and-groove modular panel system that locks together with precision. This design not only makes assembly faster but also creates a tight, energy-efficient seal that keeps the heat inside. With two adults working together, you can expect the full assembly to take 45 to 60 minutes, not including the electrical connection and final setup.
Floor and Wall Panels
Start by placing the floor panel in the exact final location. Use your level to check that it is perfectly flat in all directions. If the floor is slightly uneven, use shims under the low spots to bring it level. A level floor is critical because the wall panels will not align properly if the base is tilted. Once the floor is level, begin attaching the wall panels. The panels are designed to interlock, so you will slide the tongue of one panel into the groove of the next. Use the rubber mallet to gently tap the panels together, but be careful not to force them. If a panel does not slide easily, check for obstructions in the groove or misalignment. The back wall usually goes up first, followed by the side walls, and finally the front wall with the door. Secure each panel to the floor and to the adjacent panels using the provided screws and brackets. Do not fully tighten all screws until the entire shell is assembled, as this allows for minor adjustments.
Roof and Bench Installation
With the four walls standing and squared, lift the roof panel into place. This is a two-person job because the roof is large and awkward to handle. Align the roof with the top edges of the walls and secure it with the provided screws. Next, install the benches. The YardSauna Forest features a wide 60-inch bench that seats up to three adults, and it is designed to support significant weight. The bench brackets attach to the wall panels at the designated height, and the bench seat then locks into place. Make sure the bench is level and firmly secured before sitting on it. Some models have a lower footrest bench as well, which installs in the same manner.
Door and Glass Panel
The panoramic tempered glass front wall is one of the standout features of the YardSauna Forest, and it requires careful handling. The glass is heavy and tempered for safety, but it can still crack if dropped or struck on the edge. With two people, carefully lift the glass panel and set it into the door frame. The glass is usually held in place by a channel or brackets that are screwed into the wood frame. Do not over-tighten the screws, as this can create pressure points on the glass. Once the glass is installed, check that the door opens and closes smoothly. The door should seal tightly against the frame when closed to keep heat in, but it should not require excessive force to latch.
Connecting the Electrical Components Safely
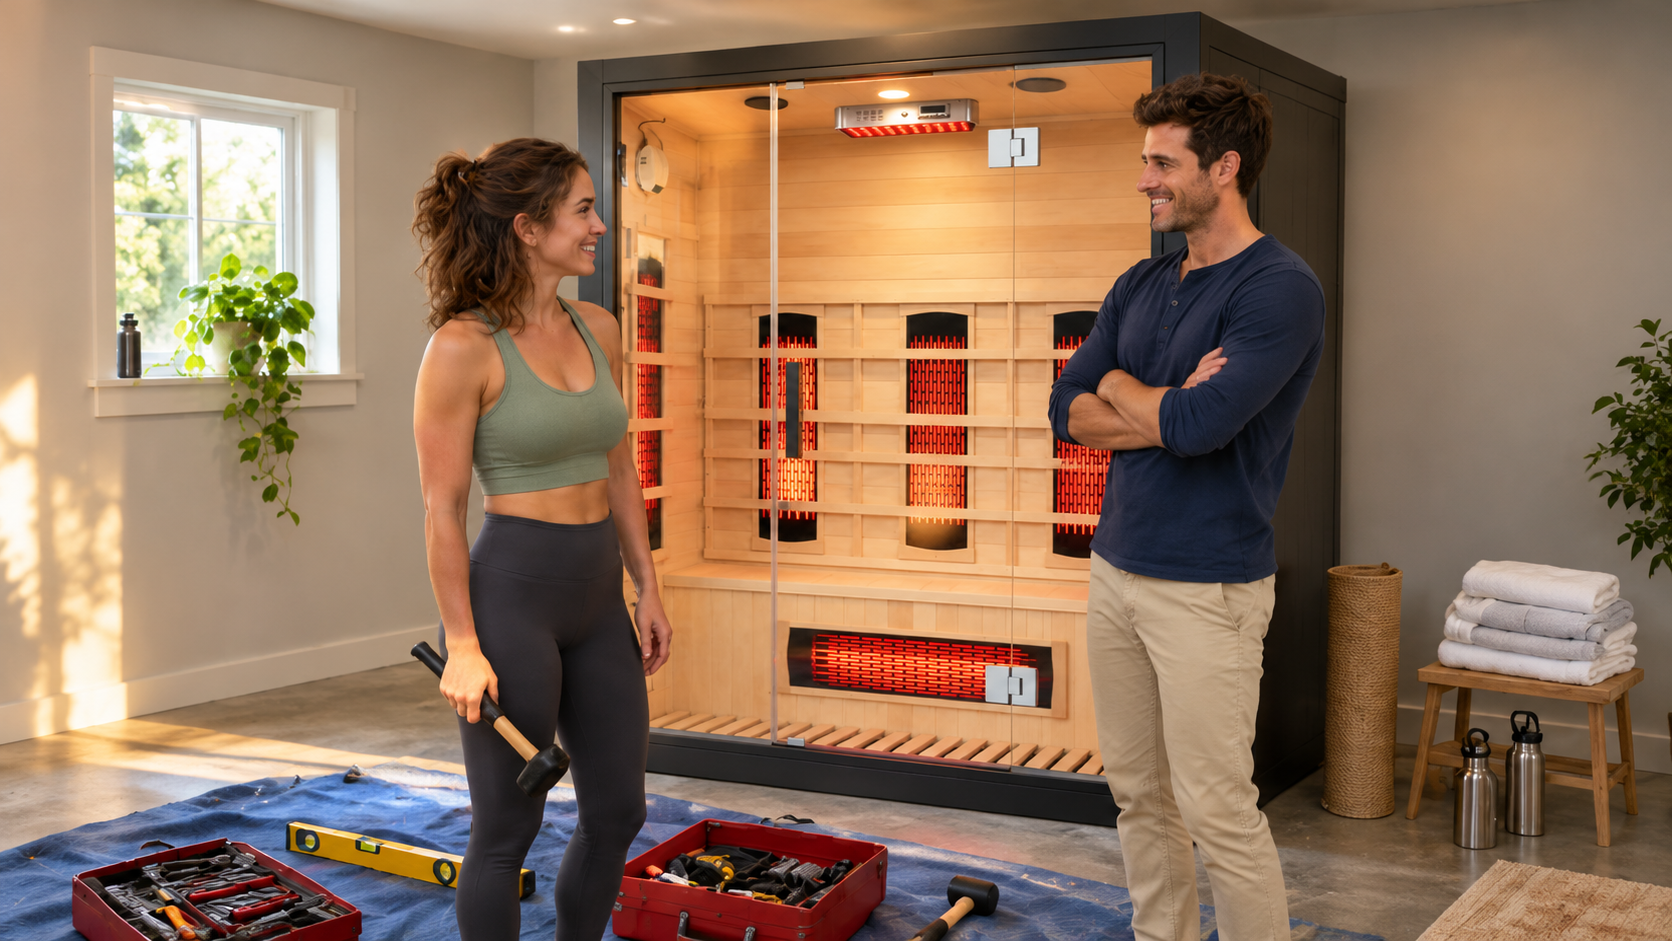
This is the most critical part of the setup, and it is where many DIYers make dangerous mistakes. The YardSauna Forest’s heating system includes quartz full-spectrum heaters, ultra-low EMF carbon panels, an overhead red light and NIR array, and a tourmaline floor heater. All of these components must be connected exactly as shown in the wiring diagram. If you are not completely confident in your ability to make these connections safely, hire a licensed electrician to do this step. The cost is small compared to the risk of electrical shock or fire.
Understanding the Wiring Layout
The sauna’s electrical system is modular, with each heating panel having a dedicated connector that plugs into a central control box. The control box, in turn, connects to the main power supply and the digital touch console. The wiring diagram in the manual will show you which connector goes where. Take your time to identify each wire and match it to the correct port. Most connectors are keyed or color-coded to prevent incorrect insertion, but you should still double-check every connection. Loose connections can cause arcing, which generates heat and can melt the plastic connectors or start a fire. After connecting all the internal components, route the main power cord out through the designated opening in the back or side of the sauna. The cord should not be pinched or stretched, and it should reach the dedicated outlet without using an extension cord. Extension cords are not rated for the continuous high current draw of a sauna and can overheat.
Testing the System
Before you close up any access panels, do a full system test. Plug the sauna into the dedicated outlet and turn on the circuit breaker. The digital touch console should light up. Set the temperature to a low setting and run the sauna for 10 to 15 minutes. Walk around the sauna and listen for any unusual buzzing or crackling sounds. Check that all heating panels are warming up evenly. The overhead red light and NIR array should illuminate, and the floor heater should begin to warm. The ventilation fan should run quietly. If anything does not work, unplug the sauna and recheck the connections. Do not continue to use the sauna if you smell burning plastic or see sparks. Once the test is successful, turn off the sauna, unplug it, and secure any remaining access panels or covers.
How the Infrared Heating System Works
Understanding how your sauna generates heat helps you use it more effectively and appreciate the engineering behind it. The YardSauna Forest uses a combination of heating technologies to create a comprehensive infrared experience.
Full-Spectrum Infrared Explained
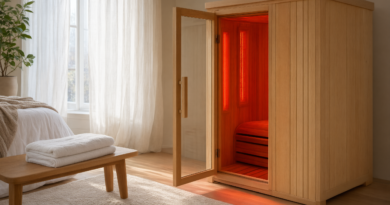
Infrared light is part of the electromagnetic spectrum, just beyond visible red light. It is divided into three categories based on wavelength: near-infrared (NIR), mid-infrared (MIR), and far-infrared (FIR). Each wavelength penetrates the body to a different depth and produces different effects. NIR has the shortest wavelength and penetrates deepest, reaching muscles and joints. MIR penetrates to a moderate depth and is often associated with improved circulation. FIR has the longest wavelength and is absorbed mostly by the skin’s surface, creating a gentle, soothing heat. A full-spectrum sauna combines all three wavelengths to provide a more complete experience than a traditional far-infrared-only sauna. The YardSauna Forest’s surround full-spectrum heating matrix uses high-output quartz heaters for the NIR and MIR components, which heat up quickly and emit a bright, warming glow. The ultra-low EMF carbon panels provide the FIR component, delivering consistent, even heat across a large surface area.
The Role of the Red Light and NIR Array
In addition to the wall-mounted heaters, the YardSauna Forest features a wide-format overhead red light and NIR array. This array is positioned above the bench so that it shines down on all three seating spots simultaneously. Red light and NIR are often used in photobiomodulation, a process where light energy is absorbed by cells to support cellular function. While research is ongoing, many users report that the overhead array adds a noticeable warmth and a sense of rejuvenation. The array is designed to be used during your sauna session, and you can control it independently from the main heaters via the digital touch console.
Tourmaline Floor Heater
The extended tourmaline floor heater is a unique feature that warms the feet and lower legs, areas that often stay cold in traditional saunas. Tourmaline is a mineral that, when heated, emits far-infrared rays and negative ions. The floor heater runs the full width of the sauna, so all three users benefit from the warmth. This is particularly appreciated in colder climates or during longer sessions when your feet would otherwise get chilly.
Ultra-Low EMF Design
Electromagnetic fields (EMF) are a concern for many sauna users, and the YardSauna Forest is designed with ultra-low EMF carbon panels. This means the panels are engineered to minimize EMF emissions, often through special wiring configurations and shielding. While no electrical device can produce zero EMF, the ultra-low EMF designation indicates that the sauna meets strict standards for reduced exposure. For those who are sensitive to EMF or simply want peace of mind, this is an important feature to consider.
Positioning and Leveling for Optimal Performance
Once the sauna is assembled and electrically connected, you still need to fine-tune its position and ensure it is perfectly level. A sauna that is not level can cause the door to bind, the benches to feel unstable, and the heating panels to sit unevenly. It can also lead to premature wear on the frame.
Final Placement Adjustments
With the sauna in its intended location, use your level to check the top, sides, and floor. If the sauna rocks or wobbles, insert shims under the low corners. Composite shims are best because they do not compress over time like wood shims. Once the sauna is level, check that the door opens and closes without resistance. The gap around the door should be even on all sides. If the door is binding at the top, the sauna may be racked, meaning the walls are not square. Loosen the corner screws slightly, adjust the frame until it is square, and retighten. This is a common issue that is easy to fix with a little patience.
Ventilation and Airflow
The YardSauna Forest includes a multi-speed fresh-air ventilation system, which is essential for comfort and safety. The ventilation fan pulls fresh air into the sauna and exhausts warm, humid air. Make sure the vent openings are not blocked by walls or furniture. The sauna should have at least a few inches of clearance on all sides to allow air to circulate. If the sauna is in a small, enclosed room, you may need to open a window or door occasionally to prevent the room from becoming too hot and humid. Proper ventilation also helps prevent mold and mildew growth inside the sauna.
Common Mistakes to Avoid During Setup
Even with the best instructions, it is easy to make mistakes that can compromise your sauna’s performance or safety. Here are the most common pitfalls and how to avoid them.
- Skipping the dedicated circuit. Plugging a 220V sauna into a 120V outlet or sharing a circuit with another appliance can trip breakers, damage the sauna, and create a fire hazard. Always have a licensed electrician install a dedicated circuit.
- Assembling on an unlevel floor. A sloped or uneven floor will cause the wall panels to misalign and the door to stick. Take the time to level the floor before you start.
- Over-tightening screws. Hemlock is a softwood, and over-tightening can strip the screw holes or crack the wood. Tighten screws until they are snug, then stop.
- Forcing panels together. If a tongue-and-groove joint does not slide together easily, do not hammer it with excessive force. Check for debris in the groove or misalignment. Forcing can damage the wood fibers and create gaps.
- Ignoring the wiring diagram. The electrical connections are not intuitive. Guessing can lead to short circuits or non-functioning heaters. Follow the diagram exactly, and if in doubt, call an electrician.
- Using an extension cord. Extension cords are not rated for the continuous high amperage draw of a sauna. They can overheat and melt. The sauna must be plugged directly into the dedicated outlet.
Practical Tips for a Smooth Setup Experience
A few simple strategies can make your sauna setup easier and more enjoyable.
- Recruit a friend. The panels are large and awkward for one person to handle. Two adults make the job much faster and safer.
- Lay out all parts before starting. Group the hardware by step number and keep the screws in small cups or a magnetic tray. This prevents lost parts and confusion.
- Work in a well-lit area. Good lighting helps you see the small connectors and alignment marks.
- Take breaks. Assembly can be physically demanding, especially when lifting the roof and glass. Do not rush; a tired assembler makes mistakes.
- Test before finalizing. Run the sauna for 15 minutes before you close up the access panels. It is much easier to fix a loose connection at this stage.
- Keep the manual. Store the instruction manual and wiring diagram in a safe place. You will need them for future maintenance or troubleshooting.
- Protect the floor. Use a drop cloth or cardboard under the panels during assembly to prevent scratches on your flooring.
- Plan for disposal. The sauna ships with a lot of packaging. Arrange for recycling or trash pickup in advance.
Buyer Considerations: Is the YardSauna Forest Right for You?
Before you commit to the YardSauna Forest, it is worth evaluating whether this particular model fits your needs and your home. The sauna is a significant investment, and you want to be confident in your choice.
Space and Capacity
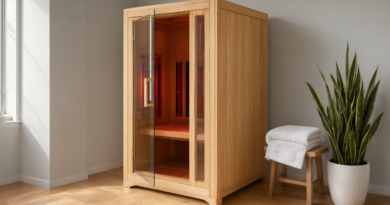
The YardSauna Forest measures 60 inches wide, 45 inches deep, and 75 inches tall. That footprint of 60 by 45 inches means you need a floor space of at least 5 feet by 4 feet, plus clearance for the door swing and ventilation. The interior bench is 60 inches wide, which comfortably seats three average-sized adults. If you are tall, the 75-inch interior height gives you enough headroom to sit upright without feeling cramped. If you have a smaller space, a 2-person sauna might be a better fit, but for a family or couple who want room to stretch out, the 3-person capacity is ideal.
Heating Technology and Features
Not all infrared saunas are created equal. The YardSauna Forest’s surround full-spectrum heating matrix sets it apart from basic far-infrared-only models. The combination of quartz and carbon heaters provides both quick heat-up and deep, penetrating warmth. The overhead red light and NIR array is a premium feature that is not found on many saunas in this price range. The tourmaline floor heater is another differentiator, especially if you tend to have cold feet. The Bluetooth audio system and ambient LED lighting add to the overall experience, making the sauna a place you will want to spend time in.
Material Quality and Certifications
The sauna is built from 100% non-toxic Canadian Hemlock, a wood prized for its strength, light color, and resistance to warping. Hemlock is also low in resin, so it does not emit strong odors when heated. The sauna carries UL, ETL, CE, and ISO 9001 certifications, which means it has been tested for safety and quality by independent organizations. These certifications are important because they give you confidence that the electrical components and construction meet rigorous standards. When comparing saunas, always look for these certifications, as some cheaper models lack them.
Electrical Requirements Revisited
The 220V-240V requirement is a double-edged sword. On one hand, it allows the sauna to heat up faster and maintain higher temperatures than a 120V model. On the other hand, it requires a dedicated circuit and professional installation, which adds to the upfront cost. If you are renting or cannot easily add a circuit, a 120V plug-in sauna might be more practical. However, for most homeowners, the performance benefits of 220V are worth the extra effort. The YardSauna Forest is designed for permanent installation, so it is best suited for those who own their home and plan to stay for several years.
Setting up a home infrared sauna is not just about following instructions; it is about creating a space where you can truly relax and recharge. Taking the time to do it right pays off every time you step inside.
Step-by-Step Setup Checklist
Use this checklist to ensure you have not missed any critical steps in your YardSauna Forest setup.
- Confirm the location – Check ceiling height, floor levelness, and clearance.
- Schedule the electrician – Install a dedicated 220V-240V circuit with appropriate amperage.
- Gather tools and helpers – Rubber mallet, screwdriver, level, gloves, and a friend.
- Unpack and inspect – Verify all parts against the manual and check for damage.
- Level the floor – Use shims if necessary to create a flat base.
- Assemble floor and walls – Interlock panels, tap gently, and secure with screws.
- Install roof and benches – Lift carefully and ensure everything is square.
- Mount the glass door – Handle with care and do not over-tighten.
- Connect electrical components – Follow the wiring diagram exactly.
- Test the system – Run for 15 minutes and check all heaters and controls.
- Final leveling and ventilation check – Adjust shims and ensure vents are clear.
- Enjoy your first session – Start with a lower temperature and shorter time.
Real-World Setup Examples
To give you a better idea of what to expect, here are a few scenarios based on common home setups.
Basement Installation
John and Maria wanted a sauna in their finished basement. They had a 9-foot ceiling, which was more than enough height. The floor was concrete with luxury vinyl plank, perfectly level. They hired an electrician to run a dedicated 30-amp circuit from the panel, which was only 20 feet away. Assembly took about an hour with two people. The only challenge was moving the boxes down the basement stairs, which required a third person and a furniture dolly. Once assembled, the sauna fit nicely in a corner with 12 inches of clearance on all sides. They added a small exhaust fan in the basement window to help with humidity.
Garage Conversion
Sarah wanted a sauna in her garage, which was not climate-controlled. She was concerned about temperature extremes, so she insulated the garage walls and added a mini-split for heating and cooling. The concrete floor was level, and she had a 240V outlet installed near the sauna location. Assembly was straightforward, but she had to be careful about dust and debris from the garage. She covered the sauna with a tarp when not in use to keep it clean. The garage setup worked well because the sauna’s heat did not affect the house, and she could open the garage door for ventilation after sessions.
Spare Bedroom
Mike and Lisa converted a spare bedroom into a wellness room. The room had carpet, so they placed a sheet of plywood under the sauna to create a stable, level base. They also added a waterproof mat on top of the plywood to catch any drips. The room had a standard 120V outlet, so they had an electrician run a new 240V line through the attic. The sauna fit perfectly against one wall, leaving room for a small bench and towel rack. They added a ceiling fan to help circulate air and keep the room from getting too warm. The bedroom setup was ideal because it provided privacy and a quiet atmosphere.
Maintaining Your Sauna After Setup
Once your YardSauna Forest is up and running, a little routine maintenance will keep it in top condition for years to come. The Canadian Hemlock interior should be wiped down after each use with a soft, dry cloth to remove sweat and moisture. Avoid using harsh chemicals or abrasive cleaners, as they can damage the wood. Periodically, you can lightly sand any rough spots and apply a sauna-specific wood treatment if desired, though many users prefer to leave the wood natural. The glass door can be cleaned with a mild glass cleaner, but be careful not to spray the wood. The ventilation fan should be checked monthly for dust buildup, and the filters, if any, should be cleaned or replaced according to the manual. The heating panels require no maintenance, but you should inspect the electrical connections annually for signs of wear or looseness. If you notice any unusual smells, sounds, or performance issues, unplug the sauna and contact the manufacturer for support.
Closing Summary: Your Path to a Perfect Home Sauna
Setting up the YardSauna Forest 3-Person Infrared Sauna is a manageable project that delivers a lifetime of relaxation and wellness benefits. By planning your location, arranging for a dedicated electrical circuit, and following the step-by-step assembly instructions, you can have your sauna ready in about an hour. The modular tongue-and-groove panels, full-spectrum heating matrix, and premium features like the overhead red light array and tourmaline floor heater make this sauna a standout choice for homeowners who want a high-quality, low-EMF infrared experience. If you are ready to bring the warmth and comfort of a home sauna into your life, the YardSauna Forest 3-Person Infrared Sauna is a solid investment that is designed to be assembled with confidence and enjoyed for years. This guide is for informational purposes only.
Frequently Asked Questions
1. Do I need a professional electrician to install the YardSauna Forest?
Yes, you need a licensed electrician to install a dedicated 220V-240V circuit for the sauna. The sauna draws significant power and must be on its own circuit with no other loads. Attempting to wire it yourself is dangerous and may void the warranty.
2. Can I assemble the sauna by myself?
It is possible but not recommended. The panels are large and heavy, and the roof and glass door require two people to lift safely. Having a helper makes the process faster and reduces the risk of injury or damage.
3. How long does assembly take?
With two adults, the physical assembly of the modular panels typically takes 45 to 60 minutes. This does not include unpacking, electrical connection, or final leveling, which can add another hour or more.
4. What kind of floor is best for the sauna?
A level, hard surface like concrete, tile, or wood is ideal. Carpet is not recommended because it can trap moisture and make leveling difficult. If you must place the sauna on carpet, use a plywood base and a waterproof mat.
5. Can I put the sauna outdoors?
The YardSauna Forest is designed for indoor use. Placing it outdoors would expose it to moisture, temperature extremes, and UV damage, which could warp the wood and damage the electrical components.
6. How much clearance do I need around the sauna?
Leave at least 12 inches of clearance on all sides for ventilation and maintenance access. The front of the sauna needs additional space for the door to swing open.
7. Is the sauna difficult to move once assembled?
Yes, once assembled the sauna is heavy and bulky. It is best to choose its permanent location before assembly. If you must move it later, you will likely need to disassemble it partially and use furniture sliders or professional movers.
8. What is the difference between the quartz and carbon heaters?
Quartz heaters emit near- and mid-infrared wavelengths, which penetrate deeper into the body and heat up quickly. Carbon panels emit far-infrared wavelengths, which provide gentle, even surface heat. The YardSauna Forest combines both for a full-spectrum experience.
9. How do I clean the interior of the sauna?
Wipe down the wood with a soft, dry cloth after each use to remove sweat. For deeper cleaning, use a damp cloth with mild soap and water, then dry thoroughly. Avoid harsh chemicals and abrasive scrubbers.
10. Can I use the sauna if I have a pacemaker or other medical device?
You should consult your physician before using an infrared sauna if you have a pacemaker, defibrillator, or other implanted electronic device. The electromagnetic fields and heat could potentially interfere with the device.
11. What is the warranty on the YardSauna Forest?
Warranty terms vary, so check the manufacturer’s documentation that comes with your sauna. Most reputable sauna brands offer a limited warranty on the heating elements, electronics, and wood structure.
12. How much does it cost to run the sauna?
Operating costs depend on your local electricity rates and how often you use the sauna. A 220V sauna typically uses 2-4 kWh per session, which translates to roughly $0.25 to $0.50 per hour at average US electricity prices.
For more on low-EMF home infrared saunas and the models we offer, visit yardsauna.com.
This article is for informational purposes only and does not constitute medical advice. Always consult a qualified healthcare provider before starting any new wellness routine, especially if you have pre-existing conditions or are pregnant.