
How to Maintain a Home Infrared Sauna: A Complete Guide
Regular maintenance is the single most important habit for extending the life of your home infrared sauna and protecting the health benefits you bought it for. A clean, well-cared-for sauna heats more evenly, uses less energy, and keeps the air inside free of dust, sweat residue, and potential mold. This guide walks you through every routine task an owner can handle, plus the red flags that mean it is time to call a professional.
Why Sauna Maintenance Matters More Than You Think
Infrared saunas operate at lower temperatures than traditional steam saunas, typically between 120°F and 150°F. That lower heat means less intense thermal stress on the wood, but it also means sweat and skin oils do not evaporate as quickly. Over time, those residues sink into the cedar or hemlock benches and backrests, creating a perfect environment for bacteria and odor. A neglected sauna can start to smell musty within a few months of regular use, and that smell is a sign that the wood is breaking down faster than it should.
Beyond the wood, the infrared heating panels themselves need attention. Dust and lint can settle on the panel surfaces, reducing their ability to radiate heat efficiently. The electrical connections behind the panels are not something you should ever touch, but keeping the surrounding area clean and dry reduces the risk of overheating and extends the life of the emitters. Most manufacturers recommend a basic wipe-down after every session and a deeper clean every month or two, depending on how often you use the sauna.
Consistent, gentle cleaning is the best defense against premature wood degradation and electrical issues. A sauna that is wiped down after every use will look and perform better for years longer than one that is only cleaned when it starts to smell.
Essential Cleaning Supplies for Your Infrared Sauna
You do not need a cabinet full of specialty products to keep your sauna clean. In fact, harsh chemicals are the enemy of sauna wood. The interior of an infrared sauna is usually made from softwood like western red cedar, Canadian hemlock, or basswood, all of which are porous and can absorb strong cleaners. Those absorbed chemicals can then off-gas when the sauna heats up, which is exactly what you do not want to breathe during a session.
Stick to a short list of gentle, wood-safe supplies:
- Soft microfiber cloths or lint-free cotton rags
- A bucket of warm water
- Mild, unscented liquid soap or a dedicated sauna wood cleaner (check your owner manual for approved products)
- A soft-bristled brush for scrubbing stubborn spots
- Fine-grit sandpaper (220-grit or higher) for occasional wood refresh
- A vacuum with a soft brush attachment for floor and crevice cleaning
Never use bleach, ammonia, vinegar, or abrasive scrub pads on the interior wood. These can strip the natural oils from the wood, discolor the surface, and leave behind residues that become airborne when heated. If you are unsure whether a product is safe, test it on a small, hidden area of the bench first and wait 24 hours to see if there is any discoloration or warping.
How Often Should You Clean Each Part?
Your cleaning schedule depends on how frequently you use the sauna. A daily user will need to wipe down the benches and backrests after every session, while a weekend-only user can get away with a quick wipe and a monthly deep clean. Here is a practical routine that works for most owners:
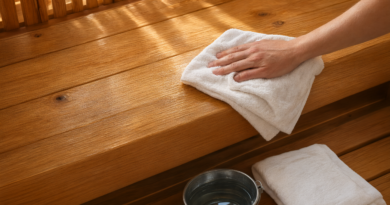
- After every session: Wipe down the bench, backrest, and any surface you touched with a dry or slightly damp microfiber cloth. This removes sweat before it soaks into the wood. Leave the sauna door open for 15-20 minutes to let residual moisture evaporate.
- Weekly: Vacuum the floor and any crevices where dust and hair accumulate. Check the heating panels for visible dust and gently wipe them with a dry cloth if needed (make sure the sauna is completely cool and unplugged first).
- Monthly: Mix a small amount of mild soap with warm water. Dampen a cloth, wring it out thoroughly so it is barely wet, and wipe down all interior wood surfaces. Follow with a clean damp cloth to rinse, then dry with a towel. Do not soak the wood.
- Every 3-6 months: Inspect the wood for rough spots, splinters, or stains. Lightly sand any rough areas with fine-grit sandpaper, always sanding in the direction of the wood grain. Wipe away dust with a damp cloth and let the wood dry completely before using the sauna again.
- Annually: Check the door hinges, handles, and any moving parts for looseness. Tighten screws if needed. Inspect the power cord and plug for damage. If anything looks worn or frayed, stop using the sauna and contact a qualified electrician or the manufacturer.
Wood Care: Keeping Cedar and Hemlock Looking New
The wood inside your sauna is not just aesthetic; it plays a functional role in absorbing and releasing moisture. Over time, the natural color of cedar or hemlock will fade slightly, and the surface may feel rougher. This is normal and does not mean the wood is failing. However, you can slow the aging process with a few simple habits.
First, always sit on a towel during your session. This single step prevents most sweat stains and body oils from ever reaching the wood. Second, avoid placing wet towels or clothing directly on the benches after your session; hang them outside the sauna to dry. Third, never apply furniture polish, wax, or oil to the interior wood unless your owner manual specifically recommends it. Most infrared sauna manufacturers advise against any oil or sealant on the interior because it can trap moisture and create a sticky surface that attracts dust.
If you notice a stain that will not come out with mild soap and water, you can try a very light sanding with 220-grit sandpaper. Sand only the stained area, following the grain, and stop as soon as the stain fades. Do not sand through the wood surface. After sanding, wipe away all dust and allow the sauna to air out for a few hours before using it again.
Preventing Mold and Mildew
Mold and mildew are rare in a properly used infrared sauna because the heat dries the interior quickly. But if you live in a humid climate or use the sauna in an unheated garage or basement, you need to be extra vigilant. The key is to never let moisture linger. After every session, leave the door open for at least 20 minutes. If the sauna is in a damp space, consider running a small dehumidifier in the room or placing a moisture absorber inside the sauna when it is not in use.
If you do see signs of mold (black or green spots on the wood), do not panic. First, make sure the sauna is completely cool and unplugged. Then mix a solution of one part mild dish soap to ten parts warm water. Dampen a cloth, wring it out well, and gently scrub the affected area. Rinse with a clean damp cloth and dry thoroughly. If the mold has penetrated deep into the wood, you may need to sand the area lightly. For extensive mold growth, contact the sauna manufacturer or a professional restoration service.
Electrical and Heater Panel Safety
Infrared saunas are electrical appliances, and the heating panels draw significant power. Any work on the wiring, control panel, or heating elements is absolutely not a DIY job. Even if you are handy around the house, opening the back of a sauna panel or touching the electrical connections can void your warranty and create a serious fire or shock hazard. Always consult a licensed electrician for any electrical repair or modification.
That said, there are a few electrical safety checks you can and should do yourself. Every month, unplug the sauna and inspect the power cord for cracks, fraying, or exposed wires. Check the plug for signs of overheating, such as discoloration or a melted smell. Make sure the outlet you use is a dedicated circuit with the correct amperage for your sauna model (check the owner manual). Never use an extension cord or power strip with an infrared sauna.
If your sauna trips the circuit breaker repeatedly, stops heating, or shows an error code on the control panel, stop using it immediately. Refer to the troubleshooting section of your owner manual. If the problem persists, call a qualified technician. Do not attempt to reset the breaker and continue using the sauna without understanding the cause.
How Infrared Heating Panels Work
Infrared saunas use carbon or ceramic panels to emit infrared radiation, which heats your body directly rather than heating the air around you. This is why infrared saunas can operate at lower temperatures than traditional saunas while still producing a deep, detoxifying sweat. The panels are typically mounted on the walls, backrest, and sometimes under the bench. They are controlled by a digital panel that lets you set the temperature and session time.
Because the panels are electrical, they generate a small electromagnetic field (EMF) when in use. Many modern saunas are designed to be low-EMF, but the exact levels vary by model. If you are concerned about EMF exposure, check your owner manual for the manufacturer’s EMF specifications. You can also use a handheld EMF meter to test your sauna, but keep in mind that readings can vary depending on where you stand and how close you are to the panels.
Background: Why Infrared Sauna Maintenance Is Different
Traditional Finnish saunas have been around for centuries, and their maintenance is well understood: you scrub the wooden benches with a brush and water, you air out the room, and you occasionally replace the stones in the heater. Infrared saunas are a much newer invention, first appearing in the 1960s and gaining mainstream popularity in the 1990s. Their maintenance needs are different because the heat source is not a pile of hot rocks but a set of electrical panels mounted inside the walls.
That difference means the wood in an infrared sauna is not exposed to the same extreme temperature swings as a traditional sauna, but it is exposed to more direct body contact. Sweat, skin oils, and lotions can build up on the benches and backrests much faster. The panels themselves do not require cleaning in the traditional sense, but they do need to be kept free of dust and debris to work efficiently. Understanding these differences is the first step to keeping your sauna in top shape.
Practical Safety Checklist for This Week
Here are four things you can do right now to improve the safety and longevity of your home infrared sauna:
- Check your owner manual for the manufacturer’s recommended cleaning products and schedule. Follow it over any general advice.
- Unplug the sauna and inspect the power cord and plug for any signs of wear or damage. If you see anything concerning, do not use the sauna until it has been checked by a professional.
- Wipe down the benches and backrest with a dry microfiber cloth after your next session, and leave the door open for 20 minutes to let moisture escape.
- Look for any rough spots or splinters on the wood surfaces. If you find them, mark the spots and plan to sand them lightly with fine-grit sandpaper this weekend.
Closing Summary: A Clean Sauna Is a Safe Sauna
Home infrared sauna maintenance is not complicated, but it does require consistency. A few minutes of wiping after each session, a monthly deep clean, and an annual safety check will keep your sauna running efficiently and safely for many years. The most important rule is to never ignore a problem: strange smells, unusual noises, error codes, or electrical issues are all signs that something needs attention. When in doubt, consult your owner manual and call a qualified professional. This article is for informational purposes only and does not constitute professional maintenance advice.
Video walkthrough: building insulated sauna walls step by step
This on-camera walkthrough breaks down the anatomy of an insulated sauna wall, layer by layer. The presenter explains that a modern sauna wall is not a single slab of wood but a carefully ordered stack: exterior siding, framing studs, insulation between the studs, a foil vapor barrier, an air gap created by furring strips, and finally the interior paneling you see and touch. He emphasizes that outdoor saunas need the full package to withstand weather, while indoor saunas still require insulation and a proper vapor barrier to prevent humidity from escaping into the rest of the house and causing mold or rot. The video uses a clear visual diagram to show each layer in order from outside to inside, making it easy to understand how the pieces work together to keep the sauna warm, dry, and comfortable.
Frequently Asked Questions
1. How often should I clean my infrared sauna?
Wipe down the benches and backrest with a dry or slightly damp cloth after every session. Do a deeper clean with mild soap and water once a month, or more often if you use the sauna daily. Always follow the schedule in your owner manual.
2. Can I use vinegar or bleach to clean the sauna wood?
No. Vinegar, bleach, ammonia, and other harsh chemicals can damage the wood and leave residues that off-gas when heated. Stick to mild, unscented soap and water, or a cleaner specifically approved by your sauna manufacturer.
3. What is the best way to remove sweat stains from cedar benches?
Start with a damp cloth and mild soap. If the stain persists, lightly sand the area with 220-grit or higher sandpaper, always following the wood grain. Wipe away all dust and let the wood dry completely before using the sauna again.
4. Should I oil or seal the interior wood of my infrared sauna?
Most manufacturers advise against applying oil, wax, or sealant to the interior wood. These products can trap moisture and create a sticky surface. Check your owner manual; if it does not specifically recommend a product, leave the wood bare.
5. How do I prevent mold in my sauna?
Always leave the sauna door open for 15-20 minutes after each session to let moisture evaporate. If the sauna is in a damp location, use a dehumidifier in the room. Wipe up any standing water immediately. If you see mold, clean it promptly with mild soap and water.
6. Can I clean the infrared heating panels myself?
Yes, but only when the sauna is completely cool and unplugged. Use a dry, soft cloth to gently wipe dust off the panel surfaces. Never use water or cleaning solutions on the panels, and never touch any electrical connections.
7. What should I do if my sauna trips the circuit breaker?
Stop using the sauna immediately. Unplug it and check the power cord for damage. Refer to the troubleshooting section of your owner manual. If the problem continues, call a licensed electrician. Do not keep resetting the breaker.
8. How long do infrared heating panels last?
Panel lifespan varies by brand and usage, but many are designed to last for thousands of hours. Regular dusting and keeping the sauna dry can extend their life. If a panel stops heating, contact the manufacturer for replacement options.
9. Is it normal for the sauna wood to change color over time?
Yes. Cedar and hemlock will naturally darken or fade slightly with heat and exposure to body oils. This is cosmetic and does not affect performance. Light sanding can restore a fresher look if desired.
10. Can I use essential oils in my infrared sauna?
Most infrared sauna manufacturers advise against using essential oils directly on the wood or heating panels, as oils can stain and create residue. If you want aromatherapy, use a small bowl of water with a few drops of oil placed away from the panels, and clean up any spills immediately.
11. What is the air gap in a sauna wall, and why does it matter?
The air gap is a small space between the vapor barrier and the interior paneling, created by thin furring strips. It allows any moisture that gets past the paneling to evaporate, preventing mold and rot inside the wall. This is a key part of the wall assembly shown in the video walkthrough above.
12. When should I call a professional for sauna maintenance?
Call a licensed electrician for any electrical issue, including wiring, control panel problems, or repeated breaker trips. Call the manufacturer or a qualified technician for structural damage, extensive mold, or heater panel replacement. Never attempt electrical repairs yourself.
For more on low-EMF home infrared saunas and the models we offer, visit yardsauna.com.
This article is for informational purposes only and does not constitute professional maintenance advice. Always follow the manufacturer instructions, consult a licensed electrician or qualified technician for any electrical or structural work, and unplug the sauna before cleaning or servicing.