Creative Sauna Placement Ideas for a Compact 1-Person Infrared Sauna in Small Homes
You have decided a home infrared sauna is the wellness upgrade you need, but now comes the tricky part: where exactly does a sauna go when square footage is tight? The good news is that a compact 1-person infrared sauna is far more flexible than you might think. With a footprint of just 3×3 feet, it can slip into spaces that a traditional steam sauna could never fit, turning an awkward corner or underused room into a daily retreat. This guide walks through creative placement ideas for small homes, practical installation considerations, and how to choose a spot that works with your lifestyle, not against it.
Why a Compact 1-Person Infrared Sauna Fits Where Others Do Not
Traditional saunas demand a dedicated room, heavy ventilation, and often a 240V electrical circuit. A compact infrared sauna, by contrast, is a self-contained cabin that plugs into a standard 120V outlet. The YardSauna Forest 1-Person Infrared Sauna measures 36 inches wide by 36 inches deep by 75 inches tall, which is roughly the footprint of a small armchair. That small size opens up placement possibilities that larger models simply cannot match.
Because infrared saunas heat the body directly rather than the air, they do not need the same heavy-duty ventilation or moisture barriers as traditional steam saunas. They produce minimal humidity, so you do not need a floor drain or waterproof surround. That means a spare bedroom corner, a walk-in closet nook, or even a section of a finished basement can work with just a few simple preparations. The key is finding a spot that is dry, level, and close enough to a dedicated outlet.
Another advantage is that a 1-person sauna is light enough to be assembled in place without structural reinforcement. The Forest model uses tongue-and-groove modular panels that two adults can assemble in 45 to 60 minutes. That means you are not locked into a permanent installation; if you move or change your mind, the sauna can be disassembled and relocated. For renters or homeowners who like flexibility, this is a major plus.
What Makes a Space Sauna-Ready?
Before you start measuring corners, it helps to understand the basic requirements. First, the floor must be solid and level. Carpet is acceptable for an infrared sauna because there is no water spillage, but a hard surface like tile, laminate, or sealed concrete is easier to clean and less likely to trap dust. Second, the sauna needs a dedicated 120V/15A circuit. That means an outlet that is not shared with other high-draw appliances like a space heater or microwave. Third, you need a few inches of clearance on all sides for air circulation and access to the rear panel if maintenance is ever needed.
You also want to think about privacy and noise. The Forest sauna includes Bluetooth speakers, so if you plan to listen to music or guided meditations, a spot away from bedrooms or shared walls might be considerate. However, the sauna itself is quiet apart from the gentle hum of the ventilation fan, so it is unlikely to disturb others. Finally, consider the path from the sauna to a shower or bathroom. You will want to rinse off after a session, so a location within easy walking distance of a bathroom is ideal, though a towel and a few minutes of cool-down can work just as well.
Creative Placement Ideas for Small Homes
Now for the fun part: where exactly can you put a 1-person infrared sauna when every square foot counts? The following ideas are organized by room type, with practical tips for each. Remember that the sauna does not need to be hidden away; with its natural hemlock wood and tempered glass front, it can be a beautiful focal point in the right setting.
1. The Bedroom Corner
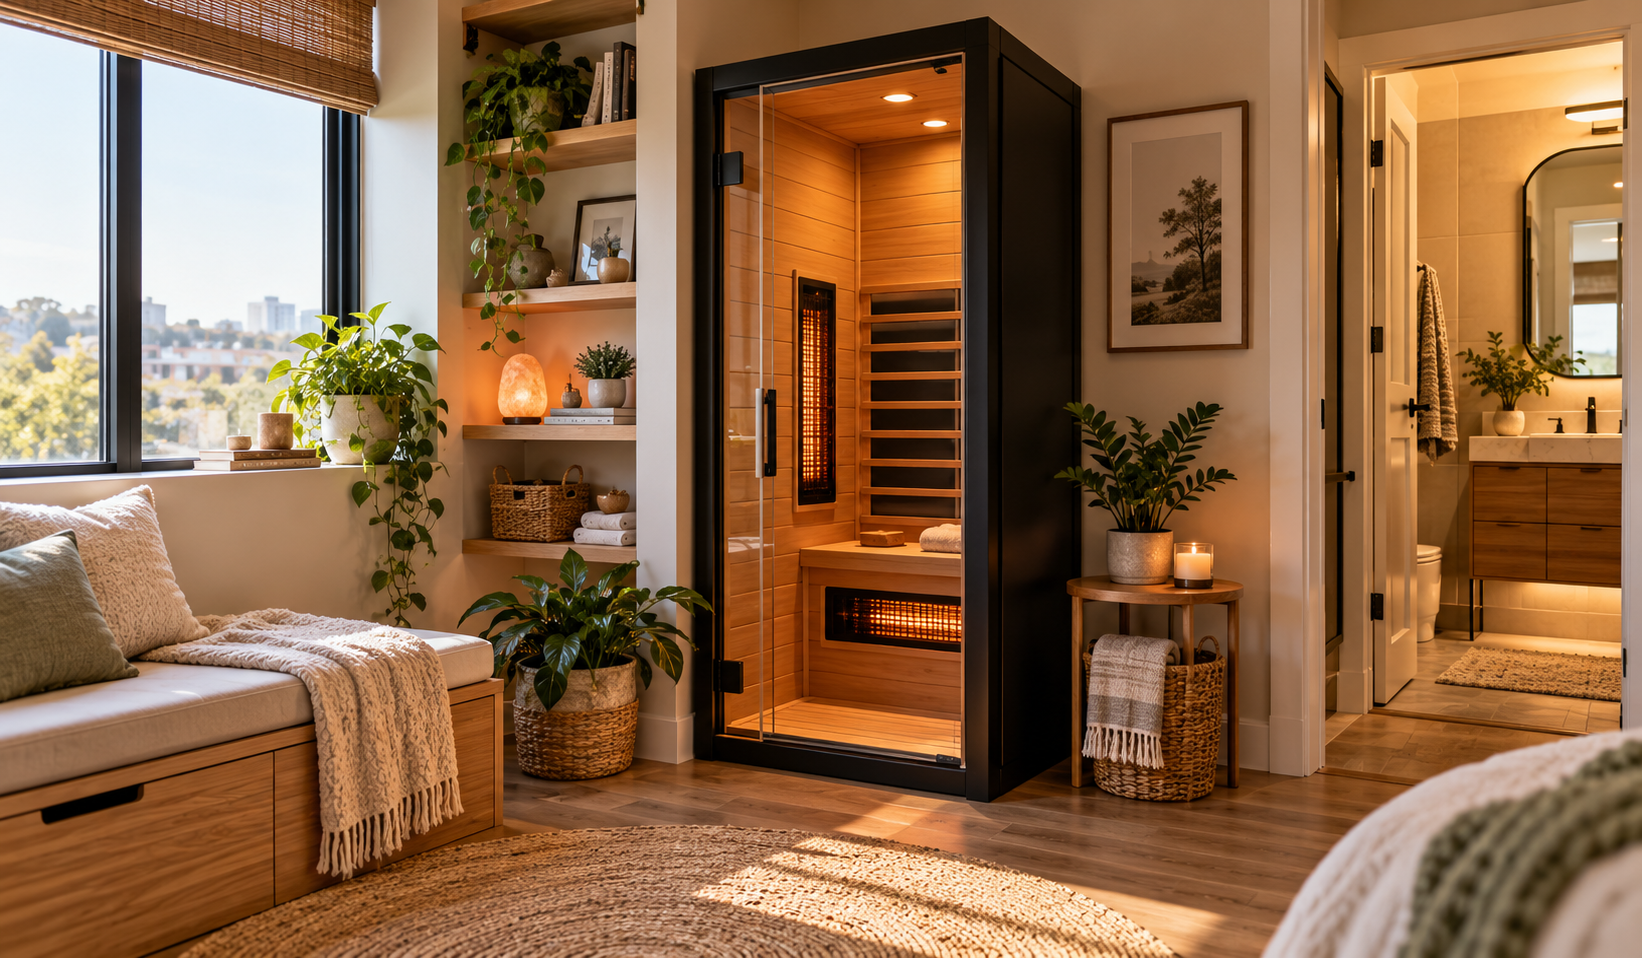
A bedroom is one of the most popular places for a compact infrared sauna because it offers privacy, convenience, and a calming pre-sleep ritual. Many users find that a sauna session an hour or two before bed helps them wind down, and having the sauna just steps from the bed makes it easy to relax without leaving the room. A corner placement works best because it uses space that is often wasted and gives the sauna a sense of enclosure.
When placing a sauna in a bedroom, consider the flooring. Carpet is fine for an infrared sauna, but you may want to place a thin, non-slip mat underneath to protect the carpet fibers from compression and to make cleaning easier. Also check that the sauna door can open fully without hitting the bed or dresser. The Forest model’s door swings outward, so you will need about two feet of clear space in front. If your bedroom has a walk-in closet, that can be an even more discreet option, provided there is an outlet inside or nearby.
One thing to keep in mind is heat dissipation. The sauna is well insulated, but the exterior will warm slightly during use. That is not a problem for most bedrooms, but you may want to avoid placing it directly against a wall with delicate wallpaper or artwork. A few inches of clearance is all you need. Also, if you are sensitive to light while sleeping, note that the Forest sauna has ambient LED lighting, but it is fully controllable and can be turned off during use.
2. The Home Gym or Exercise Room
If you already have a home gym, adding a sauna is a natural extension of your recovery routine. Many athletes and fitness enthusiasts use infrared saunas for post-workout relaxation and muscle recovery, and having one in the same room as your treadmill or weights means you can go straight from exercise to sauna without missing a beat. A compact sauna fits easily into a corner of a home gym, even one that is already crowded with equipment.
Placement considerations for a gym include flooring and ventilation. Rubber gym mats are fine under a sauna, but make sure they are rated for heat exposure if the sauna will sit directly on them. Most infrared saunas have a solid base that does not get excessively hot, so standard gym flooring is usually safe. You will also want to ensure the sauna is not blocking access to other equipment or creating a tripping hazard with its power cord. A short, dedicated outlet nearby is ideal.
The home gym is also a great place to take advantage of the sauna’s Bluetooth speakers. You can keep your workout playlist going during your sauna session, or switch to a calming podcast for the cool-down. Because the sauna is a dry heat, you do not need to worry about moisture affecting your gym equipment, though you should still wipe down the bench and floor after a sweaty session.
3. The Basement or Lower Level
Basements are often the most underutilized space in a home, and they are a natural fit for a sauna because they are typically cooler, quieter, and more private than upstairs rooms. A finished basement with a dry, level floor is ideal. Even an unfinished basement can work if you create a small platform or place the sauna on a concrete slab, provided the area is clean and free of moisture issues.
One advantage of a basement placement is that you can often dedicate an entire corner or alcove to the sauna, creating a mini wellness zone with a chair, a small table for water, and perhaps a towel rack. Because basements tend to stay cool, the sauna will not overheat the surrounding space, and the temperature contrast between the warm sauna and the cool basement air can feel invigorating when you step out.
However, basements do require extra attention to moisture and electrical safety. Check for any signs of water seepage or high humidity before placing a sauna there. A dehumidifier can help if the basement is damp. Also, make sure the outlet you use is grounded and on a dedicated circuit, as basement outlets are sometimes shared with sump pumps or other appliances. If you are unsure, have an electrician verify the circuit before plugging in the sauna.
4. Underutilized Corners and Nooks
Every home has those awkward spaces that never quite work for furniture: the landing at the top of the stairs, the alcove under a slanted ceiling, the odd corner in a hallway, or the space beside a fireplace. A compact 1-person sauna can turn these dead zones into functional wellness retreats. Because the sauna is self-contained and does not require plumbing, it can go almost anywhere there is a level floor and an outlet.
For example, a landing at the top of a staircase often has enough floor space for a 3×3-foot sauna, and it is usually a private area away from the main living spaces. An alcove under a staircase can be transformed into a cozy sauna nook with the addition of some soft lighting and a small bench outside the door. Even a large walk-in closet can become a sauna room if you remove the shelving and add an outlet.
When using an underutilized corner, pay attention to ceiling height. The Forest sauna is 75 inches tall, so you need at least 78 to 80 inches of clearance to assemble it and allow for air circulation. Slanted ceilings can be tricky, so measure carefully at the point where the sauna will sit. Also, consider the visual impact. A sauna in a hallway or landing will be seen often, so you may want to position it so the glass door faces away from the main traffic path, or add a decorative screen for privacy.
How Infrared Sauna Placement Affects Performance and Comfort
Where you put your sauna does more than just affect aesthetics; it can influence how well the sauna performs and how comfortable you are during sessions. Understanding the mechanics of infrared heating can help you choose the best spot and avoid common pitfalls.
The Science of Infrared Heat Distribution
Infrared saunas work by emitting infrared radiation that penetrates the skin and heats the body directly, rather than heating the air around you. This is different from a traditional sauna, which heats the air to high temperatures. Because infrared saunas operate at lower ambient temperatures (typically 110 to 140 degrees Fahrenheit), they are more comfortable for longer sessions and do not require the same level of insulation or ventilation.
The Forest sauna uses a combination of full-spectrum quartz heaters and ultra-low EMF carbon panels to deliver deep, even warmth. The quartz elements provide rapid heating and near-infrared wavelengths that penetrate deeply, while the carbon panels emit far-infrared wavelengths that are absorbed by the skin’s surface. Together, they create a balanced heat that warms the body from multiple angles. The sauna also includes a tourmaline-enriched floor foot heater, which addresses a common complaint with budget saunas: cold feet.
Placement can affect how quickly the sauna reaches temperature and how evenly it heats. If the sauna is placed in a cold basement or garage, it may take a few minutes longer to warm up because the surrounding air temperature is lower. However, because infrared saunas heat the body directly, the ambient room temperature matters less than it would for a traditional sauna. Still, placing the sauna in a room that stays above 60 degrees Fahrenheit will help it reach your desired temperature more efficiently and reduce strain on the heating elements.
Ventilation and Airflow Considerations
Even though infrared saunas produce minimal humidity, they still benefit from good air circulation. The Forest sauna includes a multi-speed ventilation fan that helps exchange air inside the cabin, but you should also ensure the room itself has some airflow. A small window that can be cracked open, a ceiling fan, or simply leaving the sauna door open for a few minutes after each session will help prevent any musty odors and keep the wood in good condition.
Do not place the sauna in a completely sealed, windowless closet without any ventilation, as this can trap heat and moisture over time. A walk-in closet with a louvered door or a small vent can work, but a completely enclosed space is not ideal. Similarly, avoid placing the sauna directly against a wall on all sides; leave at least a few inches of clearance so air can circulate around the back and sides.
Electrical and Safety Requirements
The Forest sauna plugs into a standard 120V/15A dedicated household outlet. That means the outlet should be on its own circuit, not shared with other appliances. Most modern homes have several dedicated circuits in the kitchen and laundry room, but you may need to have an electrician install a new outlet in the room where you plan to place the sauna. This is a relatively simple and inexpensive job, but it is essential for safe operation.
Never use an extension cord with an infrared sauna. The sauna draws a significant amount of current during operation, and an extension cord can overheat and create a fire hazard. The power cord on the Forest sauna is long enough to reach a nearby outlet, but if the outlet is too far away, have a new one installed rather than using an extension cord. Also, keep the area around the sauna clear of flammable materials, and do not store anything on top of the sauna.
Common Mistakes to Avoid When Placing a Compact Sauna
Even with the best intentions, it is easy to make placement mistakes that lead to frustration, poor performance, or even safety hazards. Here are the most common pitfalls and how to avoid them.
1. Underestimating Clearance Needs
Many people measure the footprint of the sauna but forget to account for the door swing, the need for rear access, and the space required for assembly. The Forest sauna’s door swings outward, so you need at least two feet of clear space in front. You also need a few inches on the sides and back for air circulation. Before committing to a spot, use painter’s tape to mark out the full footprint plus clearance on the floor, and make sure the door can open fully without hitting anything.
2. Ignoring Floor Level and Stability
An unlevel floor can cause the sauna panels to shift, the door to misalign, and the heating elements to work unevenly. Use a bubble level to check the floor in all directions before placing the sauna. If the floor is slightly uneven, you can use shims under the base to level it, but avoid placing the sauna on a thick, soft carpet that could compress unevenly. A hard, flat surface is always best.
3. Overlooking Electrical Requirements
Plugging a sauna into a shared circuit can trip the breaker mid-session, which is not only frustrating but can also damage the heating elements over time. Always verify that the outlet is on a dedicated 15-amp circuit. If you are not sure, check the breaker panel or have an electrician test the circuit. Never use an extension cord or power strip, and never plug the sauna into a GFCI outlet that is shared with other devices.
4. Forgetting About Privacy and Noise
While a sauna in the living room might seem convenient, it may not offer the privacy you want for a relaxing session. Think about who else is in the home and when you plan to use the sauna. If you like to sauna in the early morning or late at night, a location near bedrooms might be disruptive if you play music through the Bluetooth speakers. A basement or spare room often provides the best balance of privacy and convenience.
5. Neglecting Moisture and Humidity Control
Although infrared saunas are dry, you will still sweat, and that moisture has to go somewhere. If the room is poorly ventilated, you may notice a musty smell over time or see condensation on windows. Always use the sauna’s ventilation fan during sessions, and open a window or door afterward to let fresh air in. If you place the sauna in a basement, consider running a dehumidifier to keep the overall humidity in check.
6. Choosing a Spot That Is Too Hot or Too Cold
Extreme ambient temperatures can affect sauna performance. Placing the sauna in an unheated garage in winter may mean it takes much longer to warm up and struggles to maintain temperature. Conversely, placing it in a hot attic in summer could make the sauna uncomfortably warm before you even start. Aim for a room that stays between 60 and 80 degrees Fahrenheit year-round for the best experience.
Step-by-Step Guide to Choosing the Perfect Sauna Spot
If you are feeling overwhelmed by the options, this simple process will help you narrow down the best location for your compact infrared sauna.
- Measure your available spaces. Use a tape measure to find every area in your home that is at least 40 inches wide by 40 inches deep with a ceiling height of at least 80 inches. Do not forget closets, landings, and corners.
- Check the floor. For each candidate spot, place a level on the floor and check for any slope or unevenness. Note the flooring material and whether it can support the sauna’s weight (the Forest sauna weighs around 250 pounds, so any standard floor is fine).
- Locate the nearest outlet. The sauna needs a dedicated 120V/15A outlet within reach of the power cord (about 6 feet). If no dedicated outlet exists, factor in the cost of having an electrician install one.
- Assess privacy and noise. Stand in each candidate spot and imagine using the sauna at your preferred times. Can you relax without being seen or heard? Is the space quiet enough for you to enjoy music or silence?
- Consider the post-sauna routine. Think about what you will do after a session: shower, stretch, drink water, or go to bed. Choose a spot that makes that routine easy and natural.
- Visualize the aesthetic. A sauna is a beautiful piece of furniture. Picture how it will look in each space. Will it be a focal point or a hidden retreat? Make sure you love the way it fits into your home’s design.
- Test the temperature and airflow. Spend a few minutes in each candidate spot at different times of day. Is it too hot, too cold, or stuffy? Good airflow and a stable temperature will make your sauna sessions more enjoyable.
- Make your decision and prepare the space. Once you have chosen the spot, clean the area, lay down a protective mat if needed, and ensure the outlet is ready. Then schedule your sauna delivery and assembly.
Following these steps will help you avoid the most common placement mistakes and ensure that your sauna becomes a beloved part of your daily routine rather than an awkward afterthought.
Real-World Examples: How Homeowners Are Placing Their Compact Saunas
To give you a better sense of what is possible, here are a few real-world scenarios based on common small-home layouts. These examples illustrate how a 1-person infrared sauna can fit into different lifestyles and spaces.
The Urban Apartment Dweller
Sarah lives in a 700-square-foot one-bedroom apartment with no balcony. She wanted a sauna for post-workout recovery but thought she did not have the space. After measuring, she realized the corner of her bedroom next to the window was exactly 40 inches square. She placed the Forest sauna there, angled slightly toward the window so she could look outside while relaxing. The dedicated outlet was already on the wall, and the sauna’s compact size left plenty of room for her bed and dresser. She uses it three times a week after evening runs and loves that she can listen to podcasts through the Bluetooth speakers without disturbing her neighbors.
The Basement Gym Owner
Mike converted his unfinished basement into a home gym with rubber flooring, a power rack, and a treadmill. He added the Forest sauna in the far corner, away from the workout area but close enough to walk over after a lifting session. He placed a small bench and towel rack just outside the sauna door. Because the basement stays cool, the sauna warms up quickly and provides a welcome contrast to the chilly air. Mike had an electrician install a dedicated outlet near the corner, and he runs a dehumidifier to keep the basement dry.
The Staircase Landing Innovator
Jenny lives in a two-story townhouse with an awkward landing at the top of the stairs. The space was too small for furniture but too large to ignore. She placed the Forest sauna on the landing, using the natural alcove to create a cozy nook. The sauna’s glass front faces the stairwell, so she added a sheer curtain for privacy. The outlet was already there, and the landing’s hard floor made installation easy. Jenny uses the sauna every morning before work and says the short walk from her bedroom to the landing is the perfect transition into her day.
Buyer Considerations: What to Look for in a Compact Sauna for Small Spaces
Not all compact saunas are created equal, and when space is at a premium, you want to choose a model that maximizes performance without sacrificing quality. Here are the key factors to consider when shopping for a 1-person infrared sauna for a small home.
Heating Technology and Coverage
The most important feature of any infrared sauna is its heating system. Look for a sauna that offers full-spectrum heating, which includes near, mid, and far-infrared wavelengths. Near-infrared penetrates deeply for muscle recovery, mid-infrared improves circulation, and far-infrared promotes relaxation and sweating. The Forest sauna combines rapid-heating quartz elements with ultra-low EMF carbon panels to deliver all three wavelengths, plus a tourmaline-enriched floor foot heater to ensure even heat from head to toe.
EMF Levels
Electromagnetic fields (EMF) are a concern for many sauna users, and not all infrared saunas are created equal in this regard. The Forest sauna is designed with ultra-low EMF carbon panels, which significantly reduces exposure compared to budget models. While no sauna can claim zero EMF, choosing a model with low-EMF certification gives you peace of mind, especially if you plan to use the sauna daily.
Build Quality and Materials
A sauna is an investment, so you want one that will last. Look for solid wood construction, preferably from a non-toxic species like Canadian Hemlock. Hemlock is naturally resistant to warping and has a pleasant, subtle aroma. The Forest sauna uses tongue-and-groove panels that fit together tightly, and the tempered glass front adds durability and a modern look. Avoid saunas made with cheap plywood or particleboard, which can off-gas and deteriorate over time.
Size and Assembly
For small homes, the sauna’s footprint is critical. A 3×3-foot model like the Forest is ideal because it fits through standard doorways and can be assembled in place without needing to remove walls or windows. Check the assembly requirements: the Forest sauna can be put together by two adults in 45 to 60 minutes, and it does not require any special tools. If you rent or move frequently, a modular design that can be disassembled is a major advantage.
Features and Extras
While not essential, features like Bluetooth speakers, LED lighting, and a digital touch controller can greatly enhance your sauna experience. The Forest sauna includes all three, plus a multi-speed ventilation fan to keep the air fresh. These extras make the sauna feel like a luxury retreat rather than a simple heat box, and they can help you relax more fully during sessions.
Practical Tips and Checklist for Placing Your Sauna
Before you finalize your sauna placement, run through this checklist to make sure you have covered all the bases. These practical tips will help you avoid surprises and get the most out of your sauna from day one.
- Measure twice, order once. Confirm the exact dimensions of the sauna and the space, including door swing and clearance. Use painter’s tape to mark the footprint on the floor.
- Check the outlet. Verify that you have a dedicated 120V/15A outlet within reach. If not, schedule an electrician before the sauna arrives.
- Level the floor. Use a bubble level and shims if necessary. A stable, level base prevents door misalignment and uneven heating.
- Protect the floor. Place a thin, heat-resistant mat under the sauna if the floor is carpet or delicate wood. This also makes cleaning easier.
- Plan for ventilation. Ensure the room has some airflow, either through a window, vent, or the sauna’s built-in fan. Open the sauna door after each session to air it out.
- Consider privacy. Position the sauna so the door faces away from high-traffic areas, or add a screen or curtain if needed.
- Set up a post-sauna station. Keep a towel, water bottle, and robe nearby so you can transition smoothly from sauna to shower or rest.
- Read the manual. Before first use, review the assembly and operating instructions, and test all features to make sure everything works.
By following this checklist, you will set yourself up for a seamless installation and years of enjoyable sauna sessions.
Video Walkthrough: Seeing a Compact Sauna in a Real Home Setting
Sometimes it helps to see a sauna in action before you commit to a placement. In this video walkthrough, a sauna expert reviews a popular Costco infrared sauna and shares his honest observations after extended use. He covers build quality, assembly quirks, EMF readings, and heat distribution, giving you a realistic picture of what to expect from a budget-friendly compact sauna. While the model he reviews is not the YardSauna Forest, his insights into placement challenges—such as the need for rear access and the importance of a level floor—are directly applicable to any compact sauna installation.
The video highlights several practical considerations that are easy to overlook, including how the sauna’s door swing affects placement and why you should avoid sliding a sauna into place after assembly. The presenter also discusses the importance of checking EMF levels and heat coverage, which can vary significantly between models. If you are still deciding where to put your sauna, this walkthrough offers valuable perspective from someone who has tested dozens of saunas.
Closing Summary: Making the Most of Your Compact Sauna Placement
Finding the perfect spot for a 1-person infrared sauna in a small home is less about having a dedicated room and more about seeing the potential in the spaces you already have. Whether it is a bedroom corner, a basement gym, or an underused landing, a compact sauna like the YardSauna Forest 1-Person Infrared Sauna can transform an overlooked area into a daily wellness retreat. With its 3×3-foot footprint, full-spectrum heating, and thoughtful features like a tourmaline foot heater and Bluetooth speakers, it is designed to fit seamlessly into modern small-home living.
As you evaluate your own space, remember to prioritize a level floor, a dedicated outlet, and good airflow. Avoid the common mistakes of underestimating clearance or ignoring electrical requirements, and take the time to visualize how the sauna will fit into your daily routine. A well-placed sauna is not just a piece of furniture; it is an invitation to slow down, recover, and take care of yourself—right in the comfort of your own home.
This article is for informational purposes only and does not constitute professional advice. Always consult a qualified electrician for electrical work and follow the manufacturer’s instructions for safe installation and use.
Frequently Asked Questions
1. Can I put a 1-person infrared sauna on carpet?
Yes, you can place an infrared sauna on carpet because it does not produce water or steam. However, it is a good idea to put a thin, non-slip mat underneath to protect the carpet from compression and make cleaning easier. Ensure the carpet is low-pile and the floor is level to keep the sauna stable.
2. How much clearance does a compact infrared sauna need?
You should leave at least 2 feet of clear space in front of the sauna for the door to open fully, and 2 to 4 inches on the sides and back for air circulation. This prevents overheating and allows access for any maintenance. Always check the manufacturer’s recommendations for your specific model.
3. Does a compact infrared sauna need a dedicated circuit?
Yes, most 1-person infrared saunas, including the YardSauna Forest, require a dedicated 120V/15A circuit. This means the outlet should not be shared with other appliances. Using a shared circuit can trip the breaker and damage the sauna’s heating elements over time.
4. Can I put an infrared sauna in a closet?
A walk-in closet can work if it is large enough, has a level floor, and has access to a dedicated outlet. However, the closet must have some ventilation, such as a louvered door or a small vent, to prevent heat and moisture buildup. A completely sealed closet is not recommended.
5. What is the best room in a small home for a sauna?
The best room depends on your lifestyle, but popular choices include the bedroom, home gym, basement, or a spare room. Look for a space that is private, quiet, close to a bathroom, and has a solid, level floor. A corner or alcove often works well because it uses otherwise wasted space.
6. How long does it take to assemble a compact infrared sauna?
Most compact infrared saunas, including the YardSauna Forest, can be assembled by two adults in 45 to 60 minutes. The panels are tongue-and-groove and do not require special tools. It is best to assemble the sauna in its final location to avoid having to move it.
7. Is it safe to use an infrared sauna in a basement?
Yes, a basement is a great location for an infrared sauna as long as it is dry, level, and has a dedicated outlet. Basements tend to stay cool, which makes the sauna warm-up efficient. If your basement is damp, run a dehumidifier to keep moisture levels in check.
8. Can I move my infrared sauna after it is assembled?
While it is possible to move a compact sauna, it is not recommended because the panels can shift and the door may become misaligned. If you need to relocate, it is best to partially disassemble the sauna and reassemble it in the new spot. The modular design of the Forest sauna makes this relatively easy.
9. How close does the sauna need to be to an outlet?
The sauna’s power cord is typically about 6 feet long, so the outlet should be within that distance. Never use an extension cord, as it can overheat and create a fire hazard. If the outlet is too far, have an electrician install a new one closer to the sauna.
10. Does an infrared sauna need ventilation in the room?
Yes, the room should have some airflow to prevent heat and moisture buildup. The sauna itself has a built-in ventilation fan, but you should also open a window or door after each session to let fresh air in. Good ventilation also helps keep the wood in good condition.
11. What is the smallest space a 1-person infrared sauna can fit in?
A 1-person sauna like the YardSauna Forest has a footprint of 36×36 inches, so you need a space at least 40×40 inches to allow for clearance. The ceiling height should be at least 78 to 80 inches to accommodate the 75-inch tall sauna and allow for air circulation.
12. Can I use a compact infrared sauna in a rental apartment?
Yes, a compact infrared sauna is a great option for renters because it plugs into a standard outlet and does not require permanent installation. However, you should check your lease for any restrictions on large appliances or electrical devices, and ensure the floor can support the sauna’s weight.
For more on low-EMF home infrared saunas and the models we offer, visit yardsauna.com.
This article is for informational purposes only and does not constitute medical advice. Always consult a qualified healthcare provider before starting any new wellness routine, especially if you have pre-existing conditions or are pregnant.