YardSauna Forest 2-Person Infrared Sauna Assembly Guide
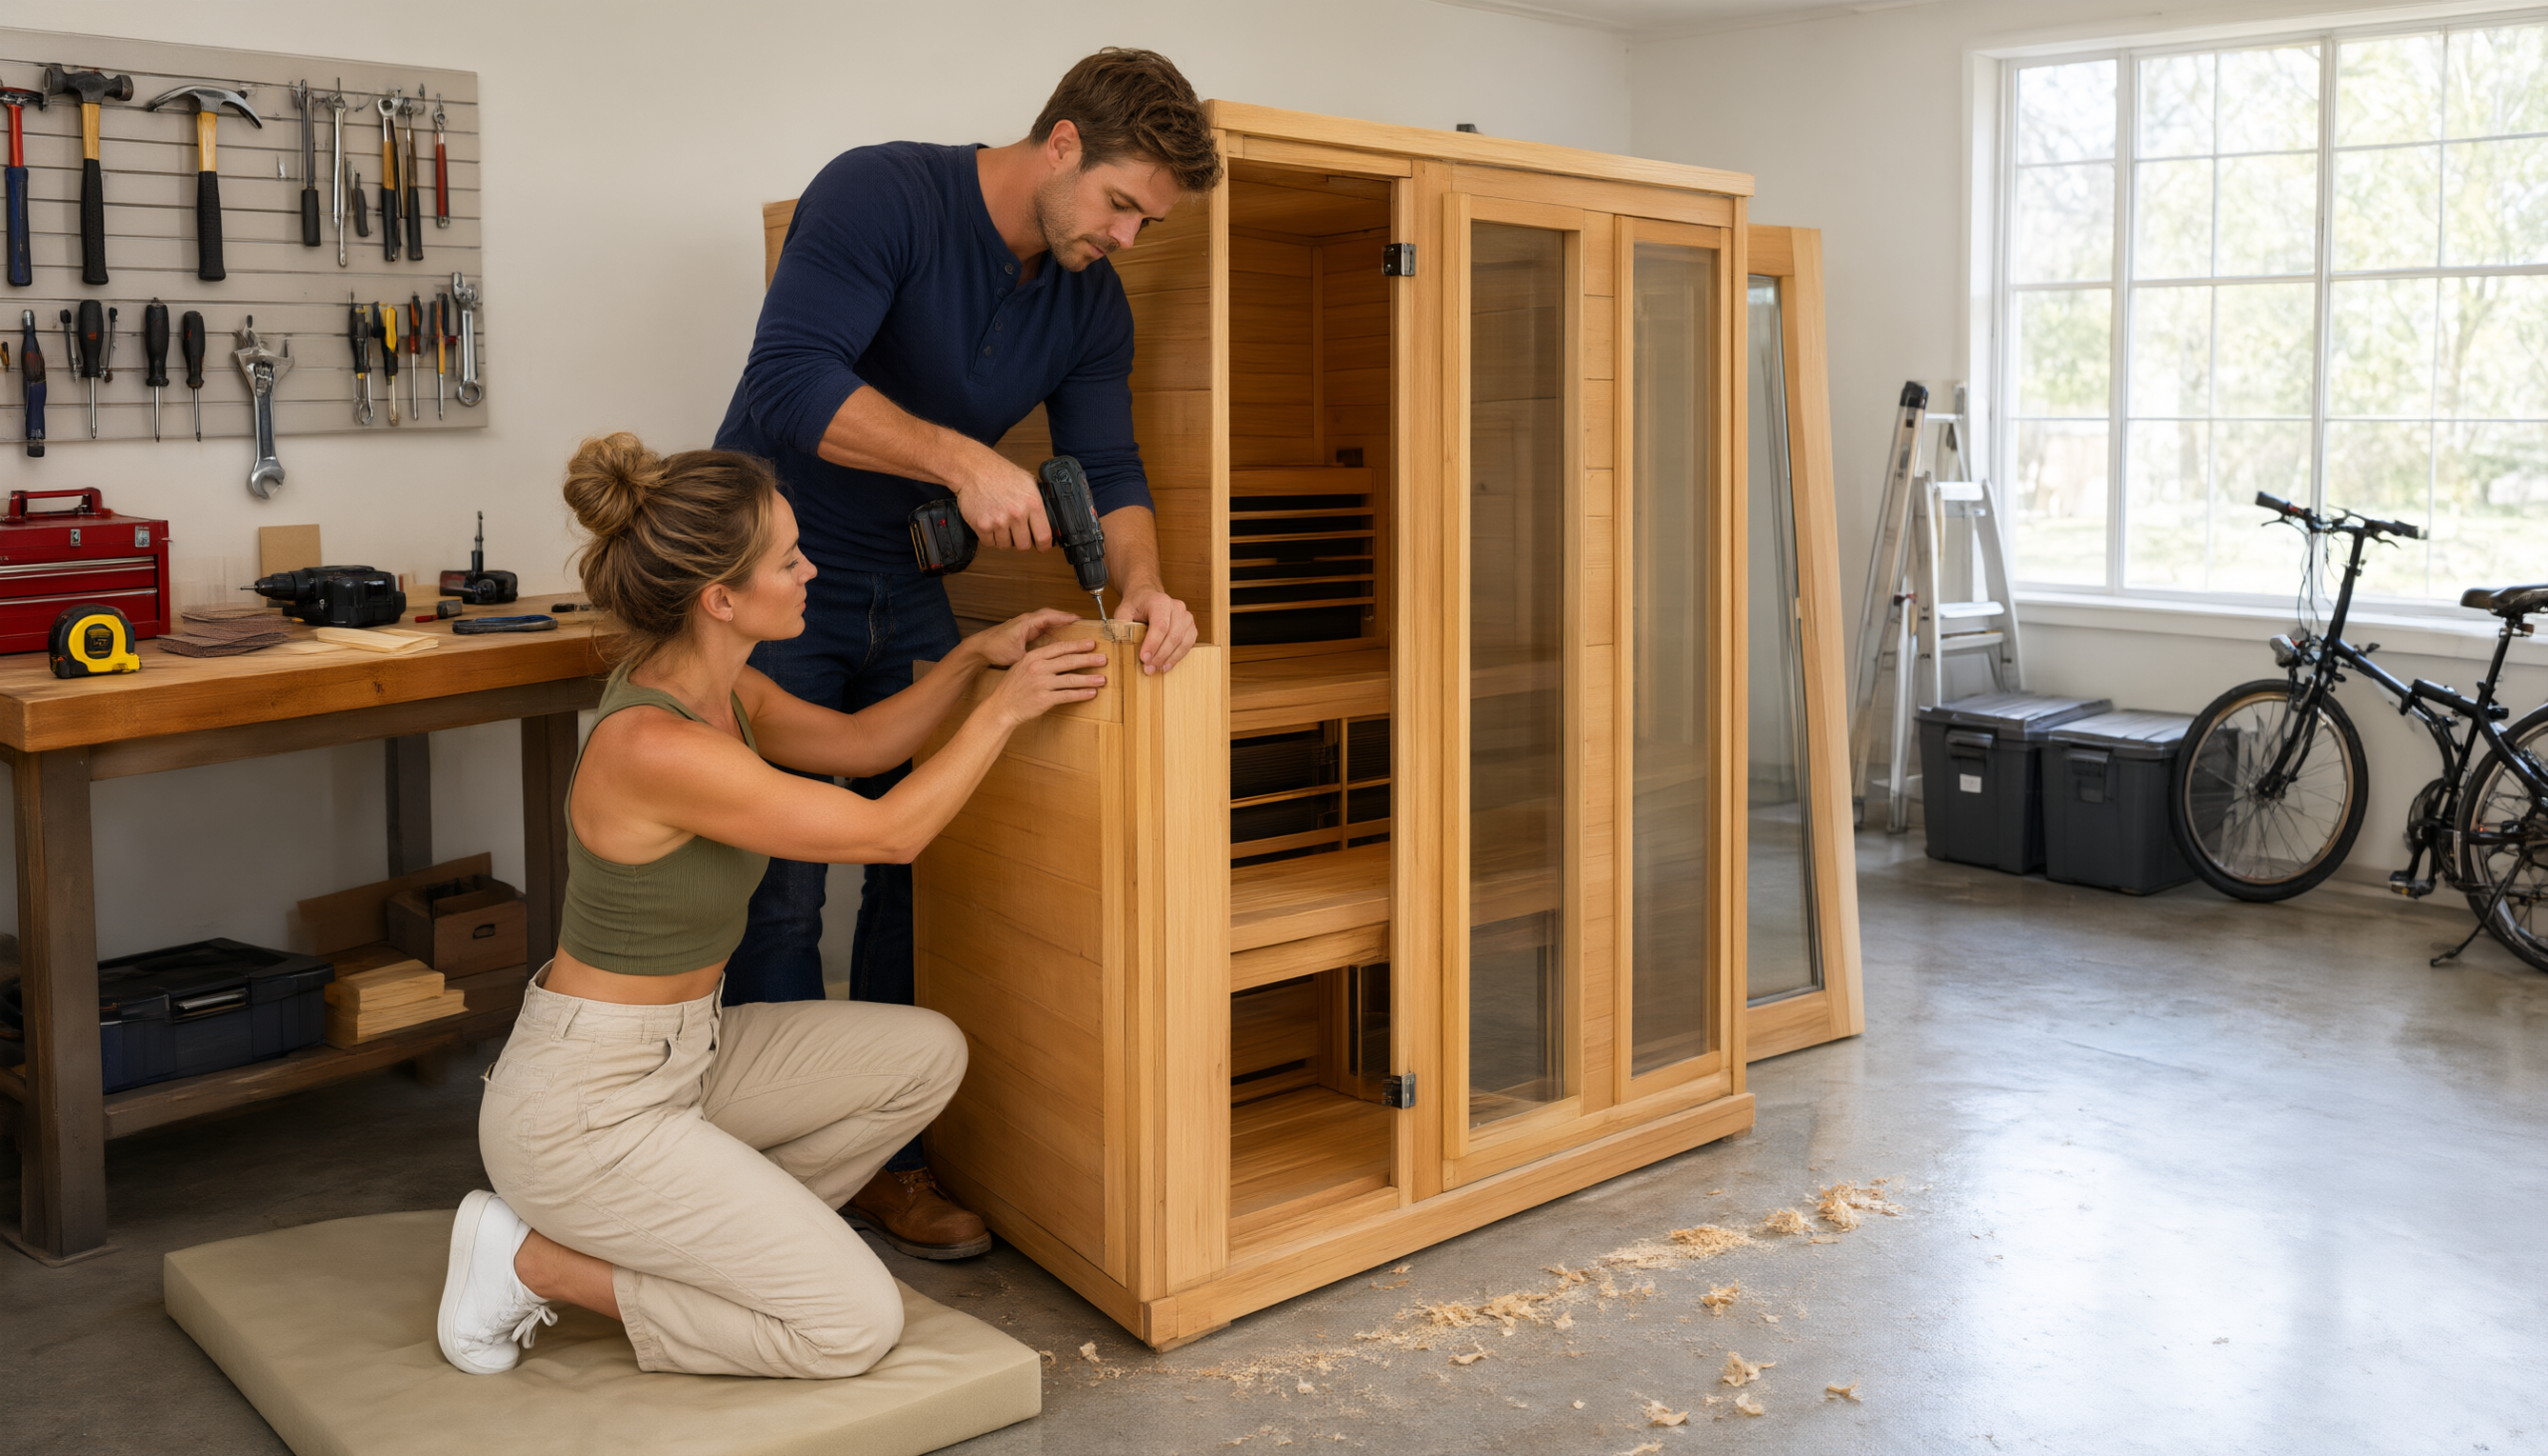
Assembling a home infrared sauna might sound like a weekend-long construction project, but the right modular design can turn it into a straightforward two-person job that takes less than an hour. The YardSauna Forest 2-Person Infrared Sauna is built around tongue-and-groove panels and simple latches, so you do not need special skills or a workshop full of tools. This guide walks through every step, from unboxing to the first warm-up, with practical advice for a smooth setup.
What Makes the Forest 2-Person Sauna Assembly-Friendly
Before diving into the step-by-step process, it helps to understand why this particular sauna is designed for DIY installation. The YardSauna Forest 2-Person Infrared Sauna uses a modular panel system: the floor, back, two sides, front, and roof all fit together with tongue-and-groove edges and exterior latches. There are no nails, no glue, and no heavy framing. The manufacturer lists the assembly time at 45-60 minutes for two adults, which is realistic if you follow the order of operations.
The sauna arrives in a flat-packed crate that weighs enough to require two people for moving. Inside, each panel is labeled or easily identifiable by shape. You will find the bench, bench support, door handle, screws, and a small hardware kit. The electrical system is pre-wired inside the panels, so you only need to connect a few plugs between the roof and walls—no electrician required for the low-voltage control wiring, though the sauna itself must be plugged into a dedicated outlet.
Materials and Construction
The Forest 2-Person is built from 100% non-toxic Canadian Hemlock, a lightweight softwood that is naturally resistant to warping and has a pleasant, subtle aroma. The panels are finished with a smooth, splinter-free surface. The front features a full-length tempered glass door that adds a modern look and makes the interior feel more open. The tongue-and-groove joints are cut precisely, so panels align without forcing. This matters during assembly because you want a tight seal for heat retention and structural stability.
What Is in the Box
When you open the crate, you should find the following components: floor panel, back panel, left side panel, right side panel, front panel with door, roof panel, interior divider, bench support, bench seat, door handle, a bag of screws, and any small accessories like the chromotherapy light. The exact hardware count can vary slightly, but the kit includes everything needed. Lay out all parts on a clean, dry surface and do a quick inventory before starting. Missing a screw or latch can slow you down, so check the parts list in the manual.
Pre-Assembly Preparation: Space, Tools, and Safety
Proper preparation prevents most assembly headaches. Choose a location that is dry, level, and close to a dedicated electrical outlet. The sauna requires a 120V, 15-amp circuit in the US, though some models may recommend a 20-amp circuit—always check the specific electrical requirements in the manual. The floor should be solid and able to support the sauna’s weight plus two occupants. Wood, tile, concrete, or low-pile carpet all work, but avoid thick carpet that could compress unevenly.
You will need very few tools: a Phillips screwdriver is the only tool required for the entire build. A rubber mallet can help nudge panels into place, but it is optional. A level is useful for checking the floor panel before you lock everything together, but the sauna is forgiving on slightly uneven surfaces because the panels interlock. Two adults are strongly recommended—not because the panels are extremely heavy, but because holding them steady while locking latches is much easier with a partner.
Safety checks before you start: make sure the area is clear of clutter, the floor is dry, and there is enough ceiling clearance. The sauna is 75 inches tall, so standard 8-foot ceilings are fine. Keep the assembly area free of water and open flames. Do not plug in the sauna until the very end, after all panels are assembled and you have completed the visual inspection.
Tool Requirements
- Phillips screwdriver (required)
- Rubber mallet (optional, for tapping panels)
- Level (optional, for floor panel)
- Clean, dry workspace
- Two adults
Electrical Considerations
The Forest 2-Person sauna plugs into a standard grounded outlet. The internal wiring for heaters, lights, and controls is pre-installed, and the only connection you make during assembly is plugging the wall cables into the roof ports. This low-voltage control wiring is safe to handle. However, the sauna draws significant power when the heaters are on, so it should be on a dedicated circuit to avoid tripping a breaker. If you are unsure about your home’s electrical capacity, consult a licensed electrician before installation. The sauna itself does not require hardwiring, which is a major advantage for DIY assembly.
Step-by-Step Assembly Instructions
Follow this sequence exactly. The order matters because each step builds on the previous one, and trying to assemble out of order can lead to misaligned panels or difficulty locking latches. Work slowly and check alignment at each stage.
Step 1: Place the Floor Panel
Set the floor panel on the exact spot where the sauna will live. The floor panel has a finished top surface and a bottom that may have small feet or a flat base. Make sure the panel is oriented correctly—the front edge is where the door will be. Use a level to check for any major slope. If the floor is slightly uneven, you can place thin shims under the low side, but the panel is rigid enough to bridge small gaps. Do not lock anything yet.
Step 2: Attach the Back Panel
Lift the back panel and set it on the rear edge of the floor panel. The back panel has a groove along its bottom edge that fits over the floor panel’s tongue. Have one person hold the back panel vertical while the other checks that it sits fully against the floor and is flush with the sides. The back panel should stand on its own once seated, but keep a hand on it to prevent tipping.
Step 3: Install the First Side Panel
Take the left side panel (or right, depending on your orientation) and fit it onto the floor panel’s side edge, then slide it forward until it meets the back panel. The side panel has a vertical tongue that fits into the back panel’s groove. Push firmly but gently until the panels are flush. Lock the exterior latches along the seam between the side and back panels. These latches pull the panels tight and hold them in place. Do not overtighten—the latch should close with moderate pressure.
Step 4: Slide in the Interior Divider and Bench Support
Inside the sauna, there is an interior divider that separates the two seating areas and provides structural support. Slide this divider into the groove on the back panel and floor. It should fit snugly but not require force. Next, position the bench support—a horizontal beam that runs along the back wall—and fasten it with the long screws from the hardware kit. Use your Phillips screwdriver to drive the screws into the pre-drilled holes. Make sure the bench support is level and secure.
Step 5: Connect the Bench Support Plug
Before installing the bench seat, locate the plug that comes from the bench support or the wall. This plug connects to an outlet inside the sauna, usually near the floor or on the back panel. The video walkthrough below shows this connection clearly. Push the plug firmly into the outlet until it clicks. This powers the bench heater or any sensors in the bench area. Do not skip this step, as it is difficult to access once the bench is in place.
Step 6: Slide the Bench onto the Support
Take the bench seat and slide it horizontally onto the bench support. The bench has a lip or groove that engages with the support. Push it back until it is flush against the back panel. The bench should sit level and not wobble. If it rocks, check that the support is fully seated and the screws are tight.
Step 7: Install the Second Side Panel
Now fit the right side panel, mirroring the first side. Ensure the interior divider stays inside its groove as you position the panel. Lock the exterior latches along the seam with the back panel and the floor. At this point, the sauna should look like a three-sided box with the front open. Take a moment to check that all latches are closed and the panels are flush.
Step 8: Install the Door Handle and Front Panel
Attach the door handle to the front panel. The handle usually has two screws that go through pre-drilled holes. Tighten them with your Phillips screwdriver. Then, bring the front panel into place. The front panel includes the glass door and frame. Align it with the floor and the two side panels. The front panel is the heaviest single piece, so two people should lift and hold it. Lock the latches on both sides, top and bottom, to secure the front panel.
Step 9: Connect the Wall Cables and Install the Roof
Before setting the roof, pull the wall cables outward so they do not get pinched. These cables are located at the top of each wall panel and have connectors that match ports on the roof. Set the roof panel on top of the sauna, making sure it sits flat and the edges align. Then, connect each wall cable to its matching port on the roof. The connectors are keyed, so they only fit one way. Push firmly until they click. This completes the electrical control circuit.
Step 10: Final Checks and First Power-Up
Walk around the sauna and inspect all latches, seams, and the door. Open and close the door to ensure it swings smoothly and the latch engages. Plug the sauna into the wall outlet. Turn on the main power switch, usually located on the roof or inside near the control panel. Set the temperature to a low setting and let the sauna run for 10-15 minutes to burn off any manufacturing residue. Then, you are ready for your first session.
Take your time with the panel alignment—forcing a tongue-and-groove joint can damage the wood. If a panel does not fit, back it out, check for debris in the groove, and try again.
How the Forest 2-Person Sauna Works: A Closer Look at the Mechanism
Understanding how the sauna heats helps you assemble it correctly and use it safely. The Forest 2-Person uses a combination of heating technologies: high-output full-spectrum quartz heaters and ultra-low EMF carbon panels. The quartz heaters provide rapid, penetrating infrared heat, while the carbon panels deliver gentle, even warmth across a larger surface. This dual approach means the sauna reaches a comfortable temperature quickly and maintains it efficiently.
Infrared heat works differently from a traditional sauna. Instead of heating the air, infrared waves directly warm your body. The full-spectrum range includes near, mid, and far infrared wavelengths. Near-infrared penetrates deepest, mid-infrared targets muscles and joints, and far-infrared is absorbed by the skin’s surface. The Forest 2-Person also includes a wide-format overhead red light and NIR array, which adds another layer of light-based therapy. Many users report feeling a deep, soothing warmth without the intense, steamy heat of a conventional sauna.
The tourmaline-enriched floor foot heater is a unique feature. Tourmaline is a mineral that, when heated, emits far-infrared rays and negative ions. The floor heater warms your feet, which helps maintain comfort during longer sessions. The sauna’s digital touch console lets you control temperature, time, and lighting. The multi-speed ventilation system brings in fresh air, preventing the cabin from feeling stuffy. The Bluetooth speakers are a nice touch for listening to music or podcasts while you relax.
All these systems are integrated into the panels, which is why the assembly is mostly about connecting pre-wired components. The wall cables that plug into the roof carry power and control signals for the heaters, lights, and fans. The bench support plug powers the bench heater. There is no complex wiring to route, no junction boxes to install, and no need to understand electrical schematics. The design is intentionally plug-and-play for the homeowner.
Common Mistakes to Avoid During Assembly
Even with a straightforward design, a few missteps can cause frustration or damage. Here are the most common pitfalls and how to avoid them.
1. Skipping the parts inventory
Do not start building until you have checked that all panels, hardware, and accessories are present. A missing latch or screw is easier to address before you have a half-built sauna. Compare the parts against the manual’s list. If something is missing, contact customer support before proceeding.
2. Assembling on an uneven or soft surface
The floor panel needs a firm, level base. Thick carpet can compress unevenly, causing the panels to shift and the door to bind. If you must place the sauna on carpet, use a piece of plywood cut to the sauna’s footprint as a stable subfloor. Check for level in both directions.
3. Forcing panels into place
Tongue-and-groove joints fit snugly but should not require hammering. If a panel does not slide in easily, check for sawdust or debris in the groove. A rubber mallet can be used for gentle taps, but never hit the panel directly with a metal hammer. Forcing can crack the wood or strip the latch.
4. Forgetting to connect the bench support plug
This is a hidden step that is easy to miss. The bench support plug is located in a tight space, and once the bench is installed, access is limited. Double-check this connection before sliding the bench into place. If the bench heater does not work after assembly, this is the first thing to inspect.
5. Pinching the wall cables under the roof
The wall cables must be pulled outward before setting the roof. If a cable gets pinched between the roof and a wall panel, it can damage the insulation or break a wire. Take your time with the roof—it is the final structural piece and the most awkward to handle.
6. Plugging in the sauna before assembly is complete
Never connect the sauna to wall power until all panels are assembled and the roof is on. The internal wiring is designed to be safe, but it is best practice to keep the unit unplugged during assembly. This prevents any accidental short if a cable is loose.
Practical Tips for a Smooth Setup
These tips come from real-world assembly experience and will help you avoid common frustrations.
- Recruit a helper: two adults make the job much easier, especially for the front panel and roof.
- Lay out all parts in order of use: floor, back, sides, divider, bench, front, roof.
- Keep the hardware in a small bowl or magnetic tray so screws do not roll away.
- Use a headlamp or work light for the interior steps—the inside of the sauna can be dark before the roof is on.
- Do not tighten latches fully until all panels in that section are aligned; then go back and snug them up.
- After assembly, run the sauna empty for 15-20 minutes at a moderate temperature to burn off any manufacturing oils or dust.
- Place a towel or mat inside the sauna to protect the bench from sweat during use.
- Read the entire manual before starting, even if you are experienced with furniture assembly.
Buyer Considerations: Is the Forest 2-Person Right for You?
Before purchasing, think about your space, electrical setup, and how you plan to use the sauna. The Forest 2-Person measures 48 inches wide, 42 inches deep, and 75 inches tall. That footprint is compact enough for a spare room, basement, or even a large bathroom. The extra-wide bench seats two adults side by side, but if you prefer to stretch out alone, the two-person size gives you room to move.
The sauna requires a dedicated 120V outlet. Most homes have this, but if your outlet is shared with other high-draw appliances, you may trip a breaker. Check the circuit rating and consider having an electrician install a dedicated line if needed. The sauna’s power draw is not extreme, but it is continuous when the heaters are on.
Price is another factor. The YardSauna Forest 2-Person Infrared Sauna is listed at $4,288. That is a significant investment, but it includes full-spectrum heating, red light therapy, a tourmaline foot heater, Bluetooth speakers, and a solid Hemlock build. Compared to custom-built saunas, which can cost two to three times as much, this is a mid-range option with premium features. The UL/ETL/CE/ISO 9001 certifications provide some peace of mind about safety and quality.
If you are new to infrared saunas, the Forest 2-Person is a good entry point because it does not require special ventilation, plumbing, or hardwiring. You can set it up in an afternoon and start using it the same day. The low-EMF design is a plus for those concerned about electromagnetic exposure, though all electrical devices emit some EMF. The sauna’s carbon panels are designed to minimize this.
One thing to note: the sauna is not a traditional steam sauna. It operates at lower temperatures (typically 120-140°F) and uses infrared heat. If you are looking for a high-heat, high-humidity experience, this is not the product for you. But if you want a convenient, low-maintenance home sauna that focuses on deep warmth and light therapy, the Forest 2-Person is worth considering.
Safety Checks After Assembly
Once the sauna is assembled, perform these safety checks before regular use.
- Inspect all exterior latches: make sure they are fully closed and the panels are tight. A loose panel can shift during use and create a gap that lets heat escape.
- Check the door: open and close it several times. The latch should engage smoothly. The tempered glass should be free of cracks or chips.
- Test the electrical connections: with the sauna unplugged, gently tug on the wall cable connectors at the roof. They should be firmly seated.
- Plug in and power on: turn on the main power switch and set a low temperature. The control panel should light up, and the heaters should begin to warm. Listen for any unusual buzzing or crackling.
- Check the ventilation: the multi-speed fan should operate at all settings. Make sure the vent openings are not blocked.
- Smell test: during the first heating cycle, a slight odor from new materials is normal. If you smell burning plastic or see smoke, turn off the sauna immediately and unplug it.
- Verify the foot heater: after a few minutes, the floor panel should feel warm to the touch, especially near the bench.
- Set a timer: use the digital console to set a 15-minute session and confirm the sauna shuts off automatically when the timer ends.
These checks take only a few minutes and give you confidence that the sauna is safe and functioning correctly.
Real-World Assembly Experience: What to Expect
Many homeowners report that assembling the Forest 2-Person is easier than expected. The panels are well-machined, and the latches align without fuss. The most challenging part is usually the roof, simply because it is large and requires two people to lift and hold while connecting the cables. The front panel with the glass door is also heavy, but the latches hold it in place once aligned.
One common observation is that the sauna is surprisingly quiet when running. The ventilation fan produces a low hum, and the Bluetooth speakers are clear. The interior lighting is adjustable, so you can create a relaxing ambiance. The bench is wide enough for two average-sized adults, though taller users may find the headroom a bit snug—the interior height is about 6 feet 2 inches before the roof.
Assembly time varies. The manufacturer suggests 45-60 minutes, but first-time builders may take up to 90 minutes, especially if they stop to read instructions carefully. Having a second person who is handy with tools helps. No special skills are needed, but patience is key.
Pros and Cons of the Forest 2-Person Assembly
To summarize the assembly experience, here is a quick pros and cons list.
Pros:
- Only a Phillips screwdriver required
- Pre-wired panels with plug-in connections
- Tongue-and-groove joints and latches—no glue or nails
- Two-person job, no professional installation needed
- Compact footprint fits through standard doorways
- Clear, logical assembly order
Cons:
- Roof and front panel are heavy and require two people
- Bench support plug is easy to miss
- Interior space is tight for working during assembly
- Requires a dedicated 120V outlet
- Not a steam sauna—lower operating temperature
Maintenance After Assembly: Keeping Your Sauna in Top Shape
Once your sauna is assembled, a little maintenance goes a long way. The Canadian Hemlock interior is naturally resistant to moisture, but you should wipe down the bench and backrest after each use with a dry or slightly damp cloth. Avoid using harsh chemicals or abrasive cleaners. The glass door can be cleaned with a standard glass cleaner.
Periodically check the exterior latches and screws for tightness. The sauna may settle slightly after the first few weeks, so re-tighten any loose hardware. The ventilation fan should be kept free of dust. If you notice a decrease in heating performance, inspect the carbon panels and quartz heaters for any visible damage, but do not attempt to repair them yourself—contact customer support.
The sauna’s electrical components are designed for long life, but like any appliance, they can wear out. The digital touch console is the most likely component to need replacement over time. Keep the sauna plugged into a surge protector to protect against power spikes. If you live in a humid climate, consider running the sauna for 10 minutes weekly even when not in use to keep the interior dry.
Video Walkthrough: See the Assembly in Action
On-Camera Assembly Demonstration
YouTube: HH INSTALLATION VIDEO – Far Infrared 2 Person Sauna – step-by-step panel setup
This video from Heavenly Health walks through the assembly of a two-person far infrared sauna that is very similar in design to the YardSauna Forest 2-Person. The presenter emphasizes working on a dry, level surface with at least two people, and notes that a Phillips screwdriver is the only tool required. The demonstration covers identifying all panels and hardware, then proceeds step by step: placing the floor panel, attaching the back and first side panel, locking latches, installing the interior divider and bench support, connecting the bench plug, sliding in the bench, adding the second side panel, installing the door handle and front panel, and finally setting the roof and connecting the wall cables. The video also mentions that no electrician is required and shows the chromotherapy light feature. Watching this can help you visualize the process before you start your own build.
Closing Summary: Is the Forest 2-Person Worth the Effort?
Assembling the YardSauna Forest 2-Person Infrared Sauna is a manageable DIY project that most homeowners can complete in under two hours with a helper. The modular tongue-and-groove panels, pre-wired electrical connections, and simple latch system eliminate the need for specialized tools or professional installation. The sauna’s full-spectrum heating, red light therapy, tourmaline foot heater, and Bluetooth speakers make it a feature-rich option at its $4,288 price point.
The assembly process itself is straightforward if you follow the correct order and avoid common mistakes like forcing panels or forgetting the bench plug. The result is a sturdy, attractive sauna that fits in a compact footprint and plugs into a standard outlet. While it is not a traditional steam sauna, the infrared heat provides a deep, soothing warmth that many users find relaxing. The low-EMF design and safety certifications add reassurance.
If you are looking for a home sauna that you can set up yourself without a contractor, the Forest 2-Person is a strong contender. Take your time, read the manual, and enjoy the process—the reward is a personal wellness retreat in your own home. This guide is for informational purposes only.
Frequently Asked Questions
1. How long does it take to assemble the YardSauna Forest 2-Person Infrared Sauna?
The manufacturer lists assembly time at 45-60 minutes for two adults. First-time builders may take up to 90 minutes, especially if they carefully read each step. Having a helper and laying out all parts beforehand can speed up the process.
2. Do I need any special tools to assemble the sauna?
No. A Phillips screwdriver is the only tool required. A rubber mallet can be helpful for gently tapping panels into place, but it is optional. A level is useful for checking the floor panel, but the sauna is forgiving on slightly uneven surfaces.
3. Can I assemble the sauna by myself?
It is not recommended. The front panel with the glass door and the roof panel are heavy and awkward to handle alone. Two adults are strongly advised for safety and ease of assembly.
4. Does the sauna require any electrical wiring or an electrician?
No hardwiring is needed. The sauna plugs into a standard 120V grounded outlet. The internal control wiring is pre-installed, and you only connect the wall cables to the roof ports during assembly. However, the sauna should be on a dedicated circuit to avoid tripping a breaker.
5. What kind of floor is best for the sauna?
A dry, level, solid surface is best. Wood, tile, concrete, or low-pile carpet all work. Avoid thick carpet that can compress unevenly. If you must place it on carpet, use a piece of plywood under the sauna for stability.
6. How heavy is the sauna, and will it fit through my door?
The sauna ships in a flat-packed crate that requires two people to move. The assembled sauna is 48 inches wide, 42 inches deep, and 75 inches tall. The panels are designed to fit through standard doorways during assembly, but measure your doorways and hallways before ordering to ensure clearance.
7. What is the difference between infrared and traditional saunas?
Traditional saunas heat the air to high temperatures (150-190°F), while infrared saunas use infrared waves to heat your body directly at lower temperatures (typically 120-140°F). Infrared heat penetrates deeper and many people find it more comfortable for longer sessions. The Forest 2-Person is an infrared sauna, not a steam sauna.
8. Is the sauna safe to use on a daily basis?
Many users enjoy daily sessions of 15-30 minutes. Start with shorter sessions and lower temperatures, and stay hydrated. Listen to your body and exit if you feel dizzy or uncomfortable. The sauna is designed for residential use and has safety certifications.
9. How do I clean and maintain the sauna after assembly?
Wipe down the bench and interior with a dry or slightly damp cloth after each use. Avoid harsh chemicals. Periodically check latches and screws for tightness. Run the sauna empty for 10-15 minutes weekly to keep the interior dry, especially in humid climates.
10. What is the warranty on the YardSauna Forest 2-Person?
The warranty details are not specified in the product listing, so you should check the manufacturer’s warranty information before purchase. Typically, saunas of this type come with a limited warranty on heating elements and wood structure. Contact customer support for specific terms.
11. Can I use the sauna outdoors?
No. The Forest 2-Person is designed for indoor use only. It is not weatherproof and should not be exposed to rain, snow, or extreme temperatures. Place it in a dry, climate-controlled space like a basement, spare room, or garage (if insulated).
12. Does the sauna come with a chromotherapy light?
Yes, the sauna includes a chromotherapy light as part of its LED lighting system. The digital touch console lets you customize the ambient lighting colors. The overhead red light and NIR array is a separate therapeutic feature.
For more on low-EMF home infrared saunas and the models we offer, visit yardsauna.com.
This article is for informational purposes only and does not constitute medical advice. Always consult a qualified healthcare provider before starting any new wellness routine, especially if you have pre-existing conditions or are pregnant.